Querying Claims
After selecting a funnel, select the icon that, when hovered, displays Table.
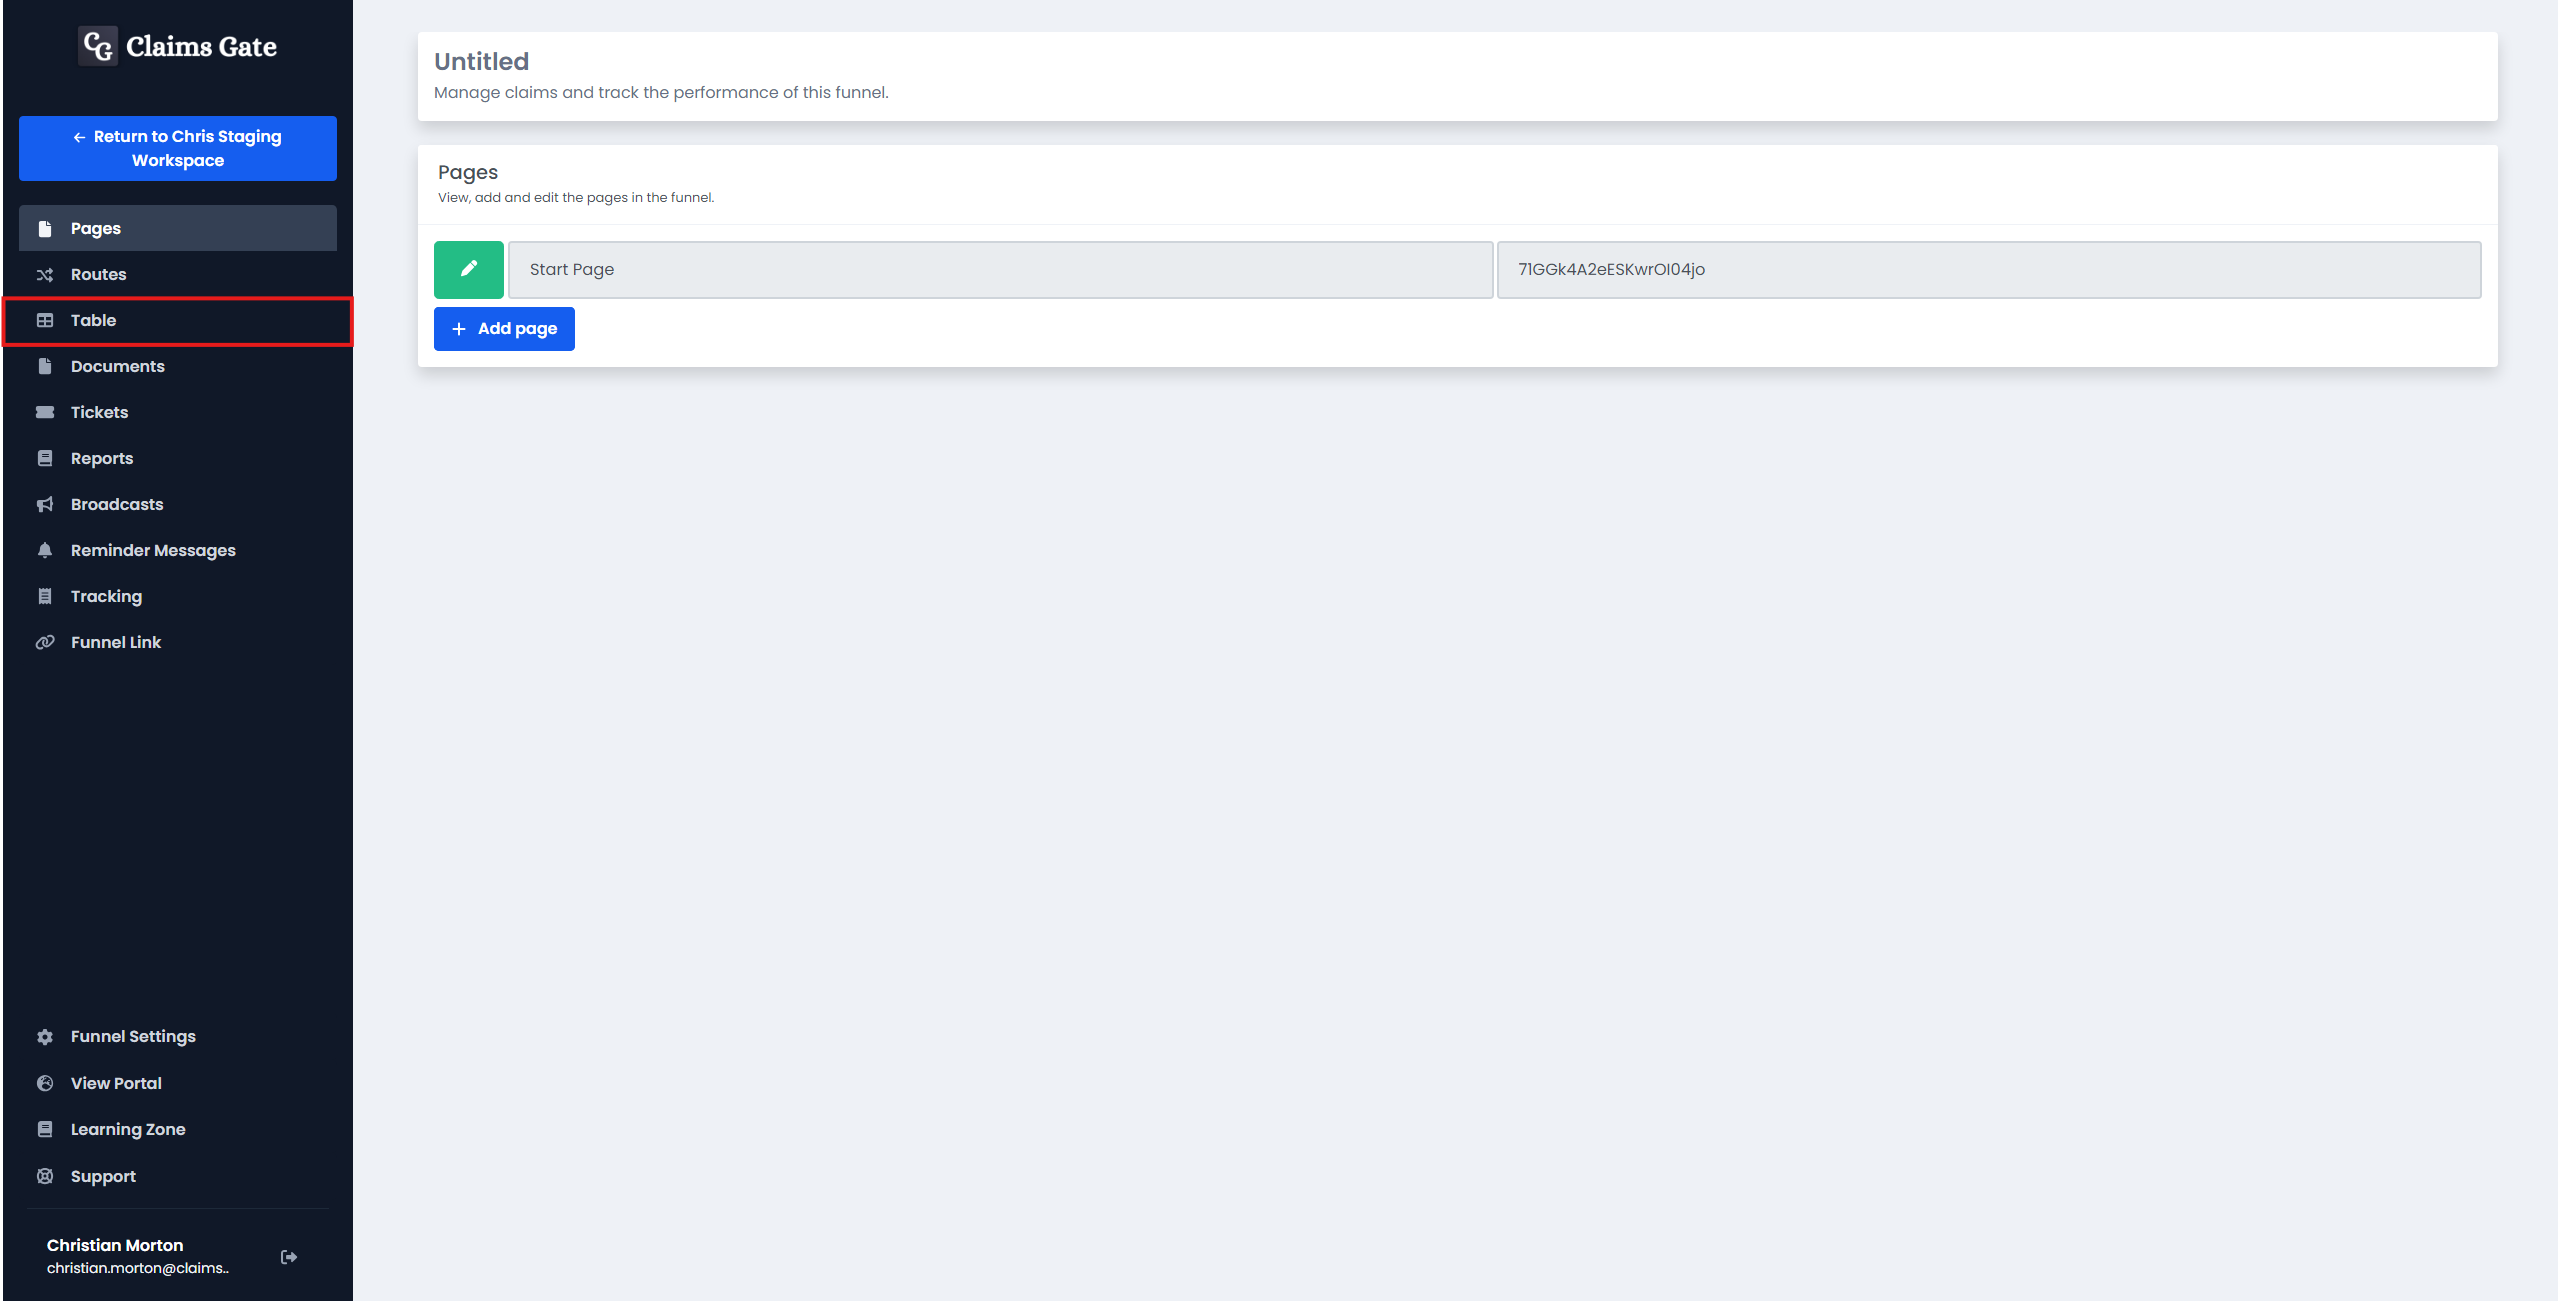
Table Components
This will bring you to the Table view, which comprises two components: the search/filters and table
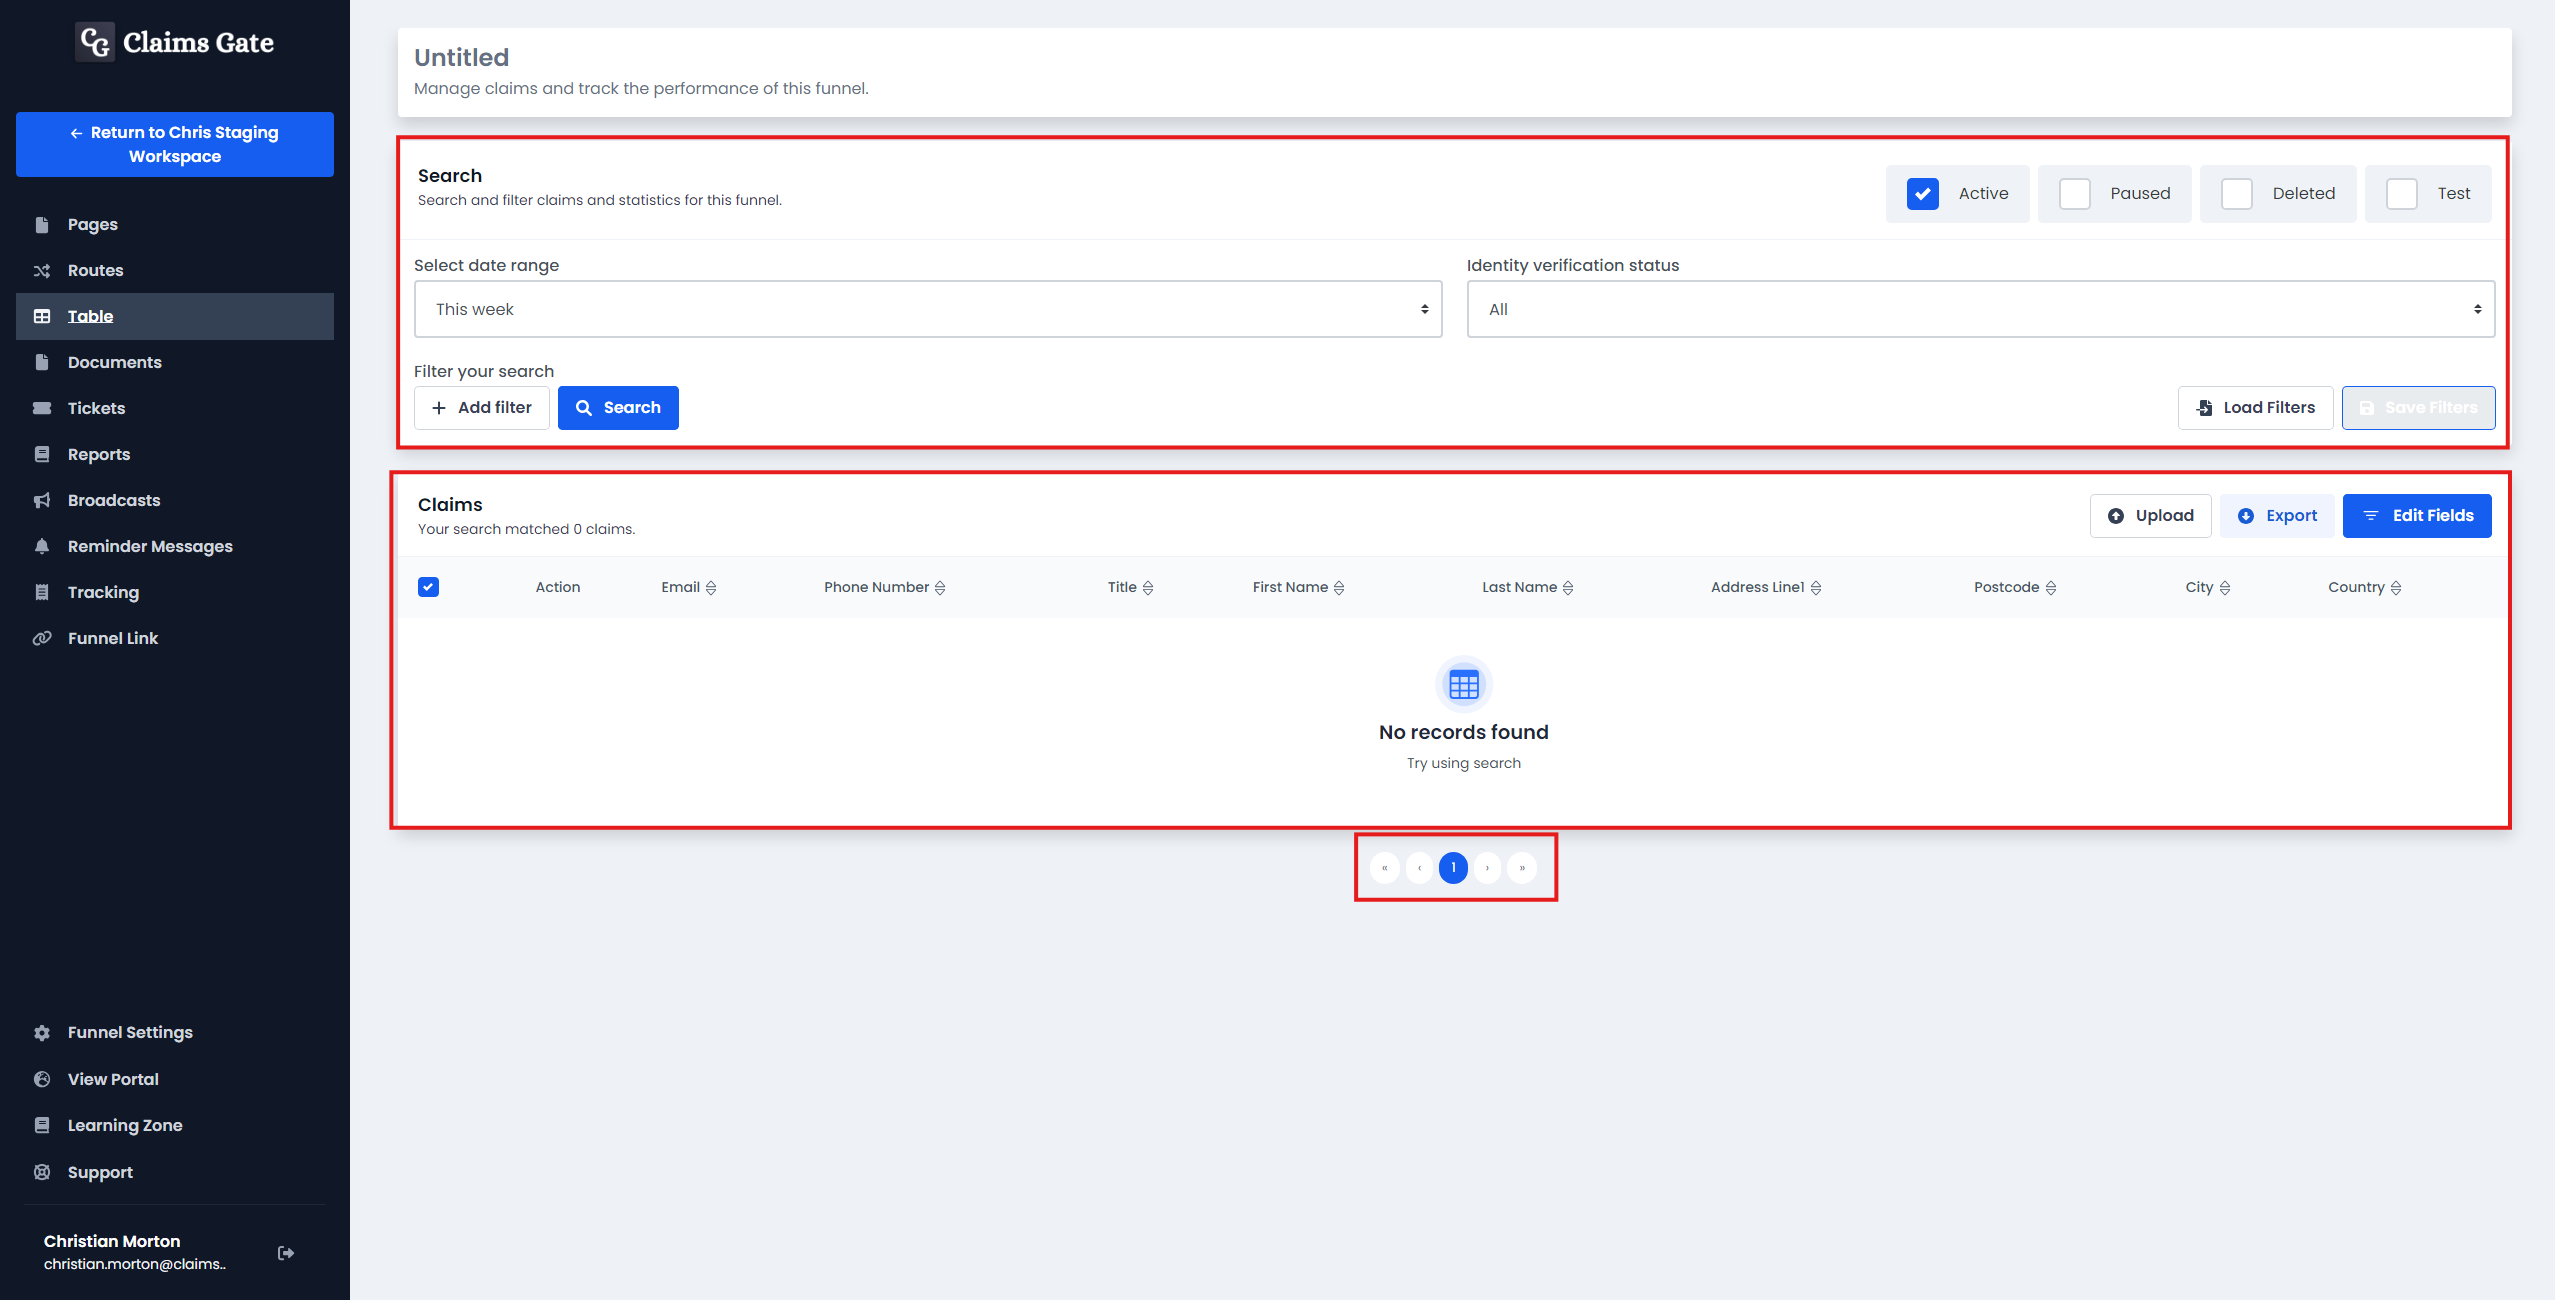
The claims which are populated inside of the table are dependent upon the filters which you set on the search. The table is default set to return all claims submitted in the past week.
You can change this by selecting the dropdown labelled select date range and changing the date range to your desired date range.
Filters
You can create custom filters by selecting the Add filter button and pressing the pencil on the left-hand side of the added filter.
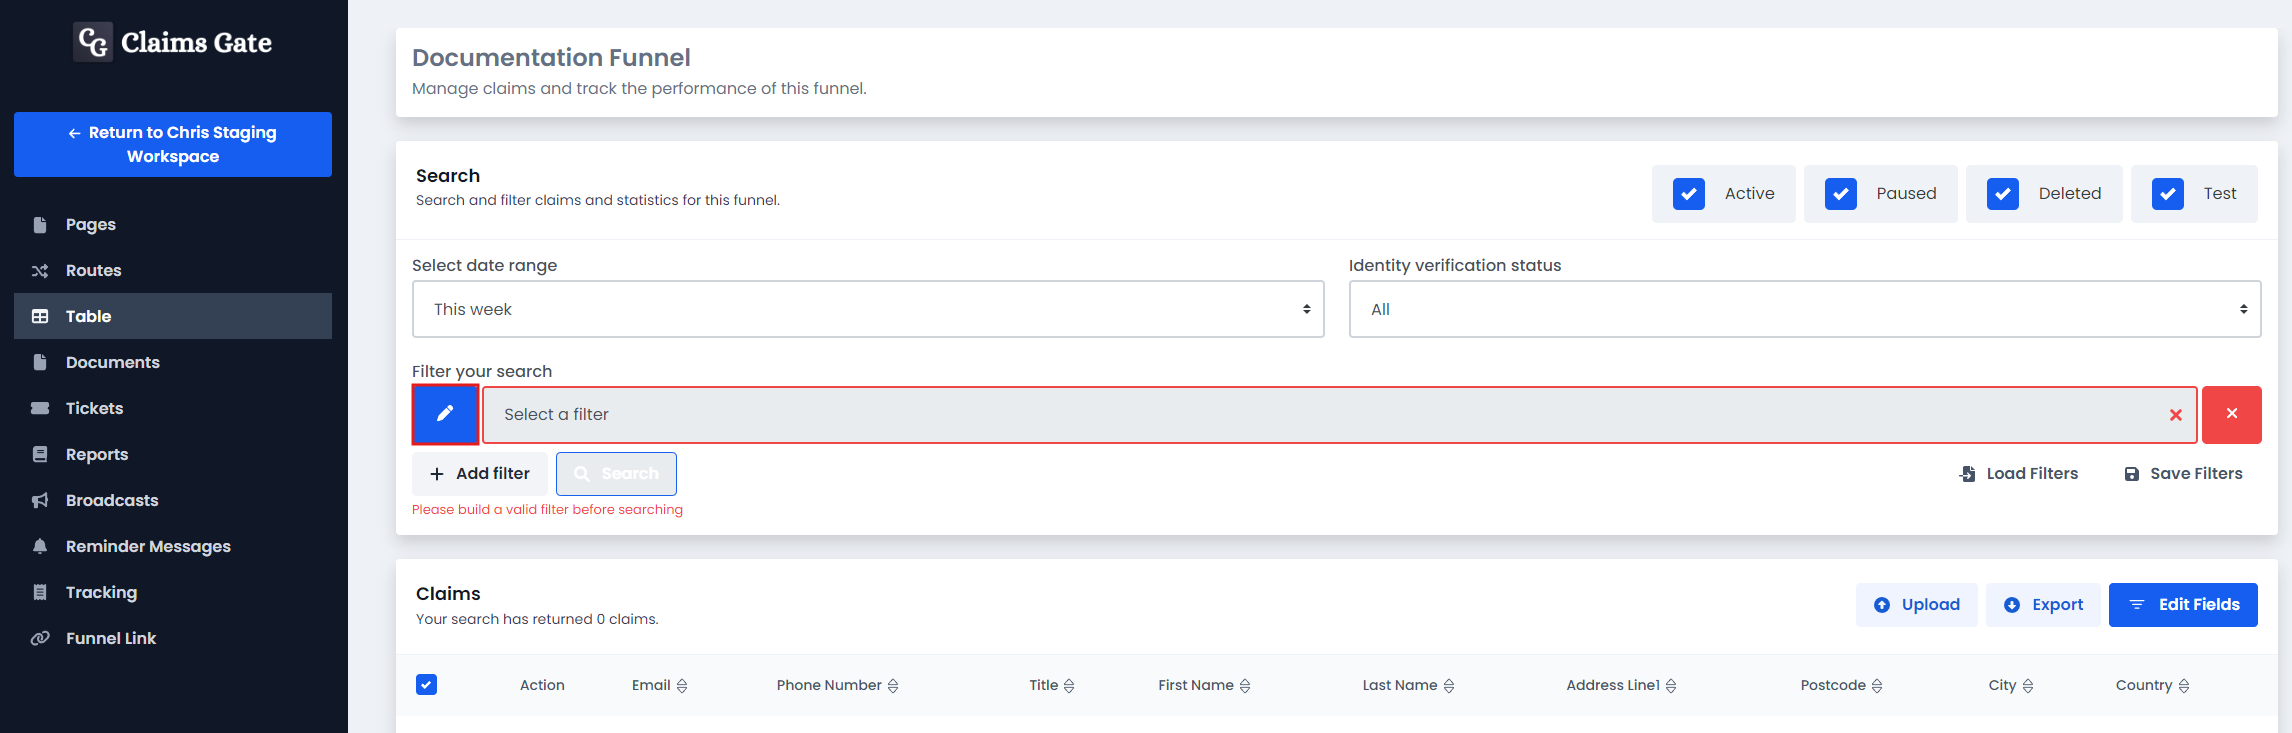
To get started with building your own filters, follow the instructions below to get started with creating some basic filters.
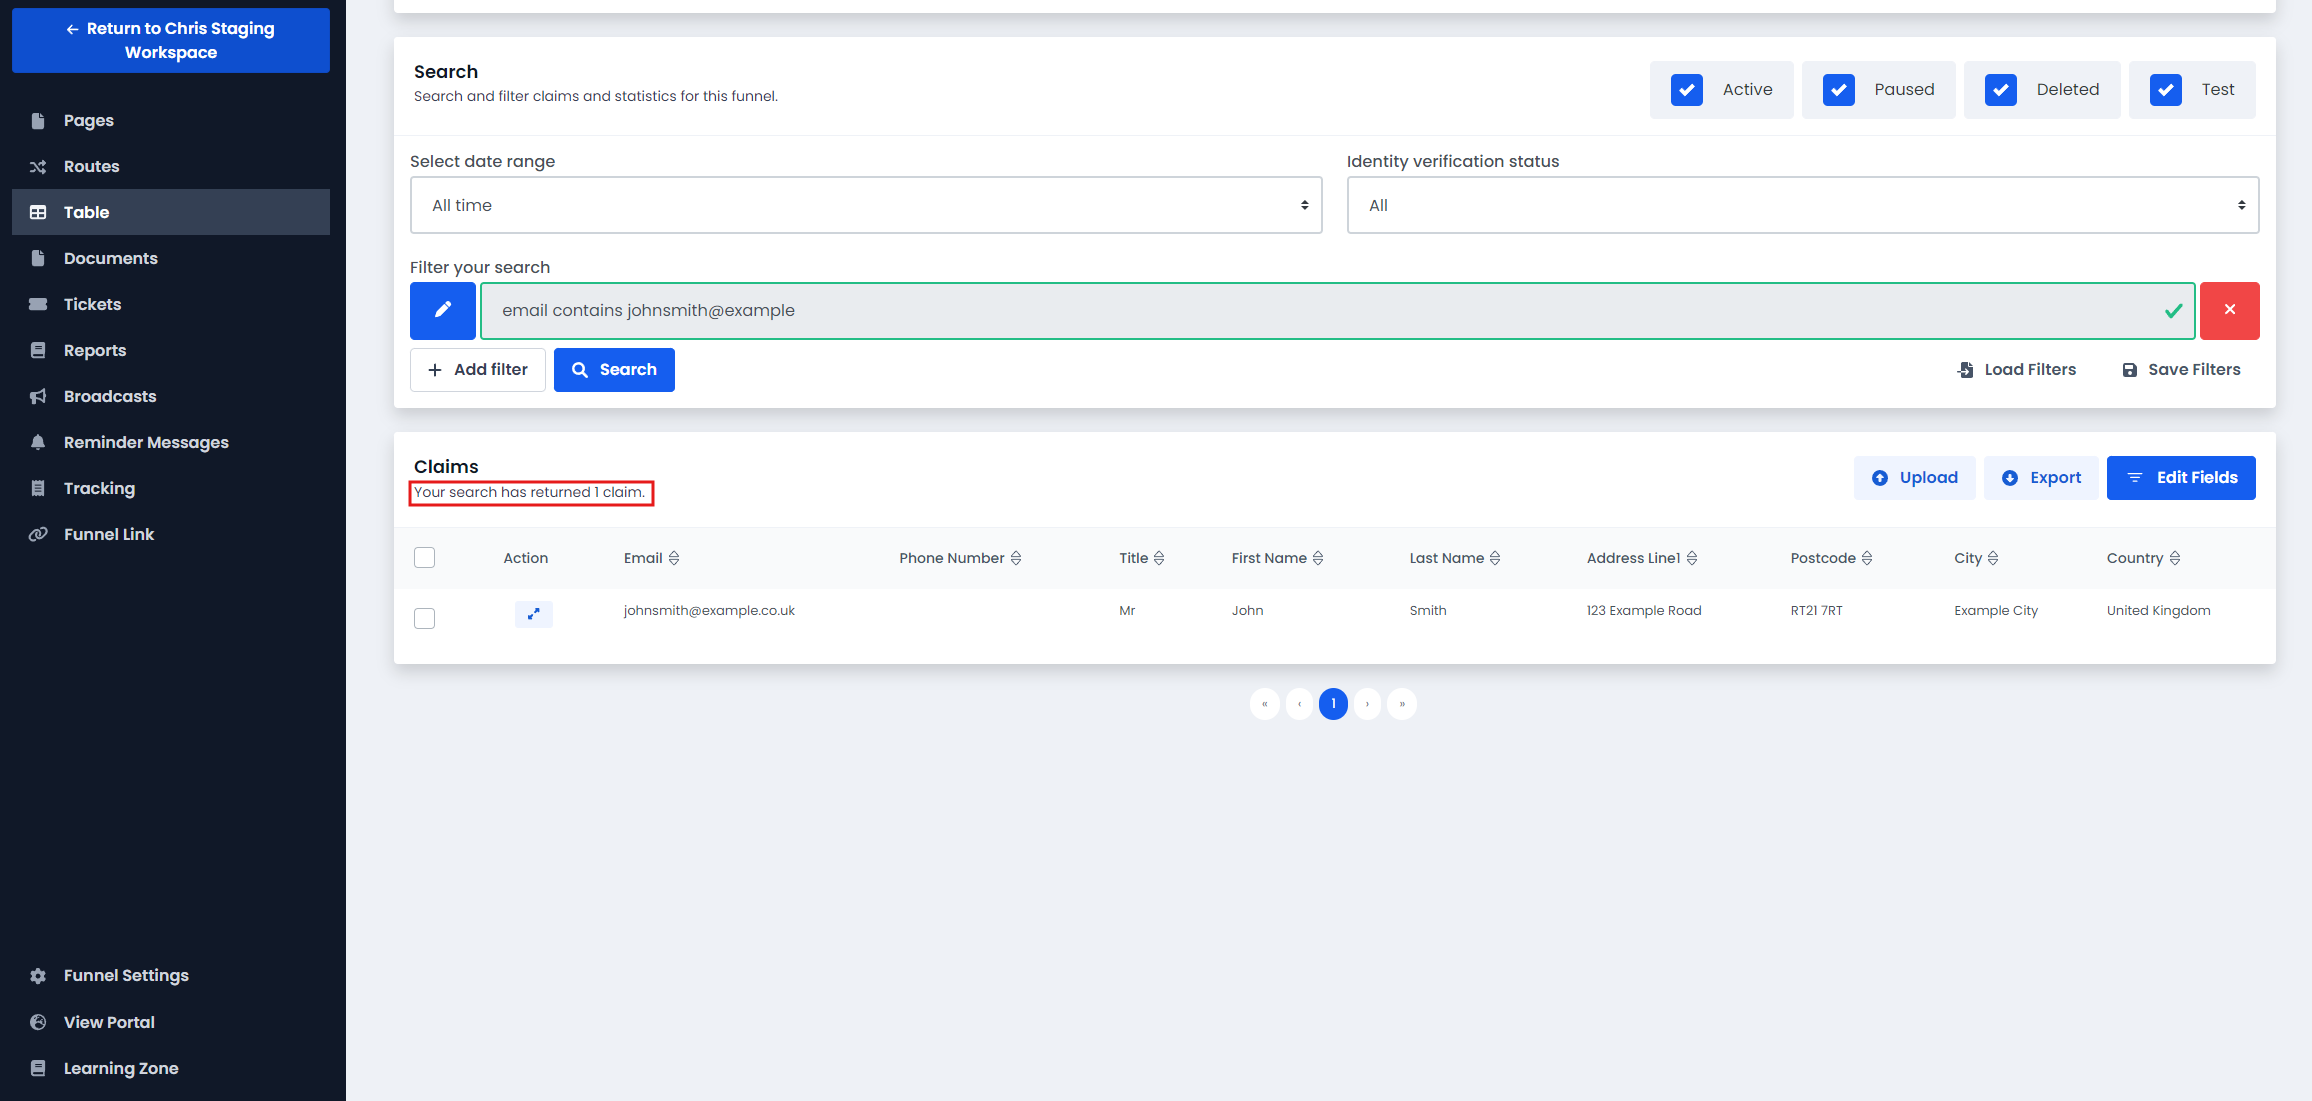
Filter to Return Claims With a Matching Email Address
Search and select the variable called email.
Select equals or contains as the condition.
Enter the email address or list of email addresses you wish to match.
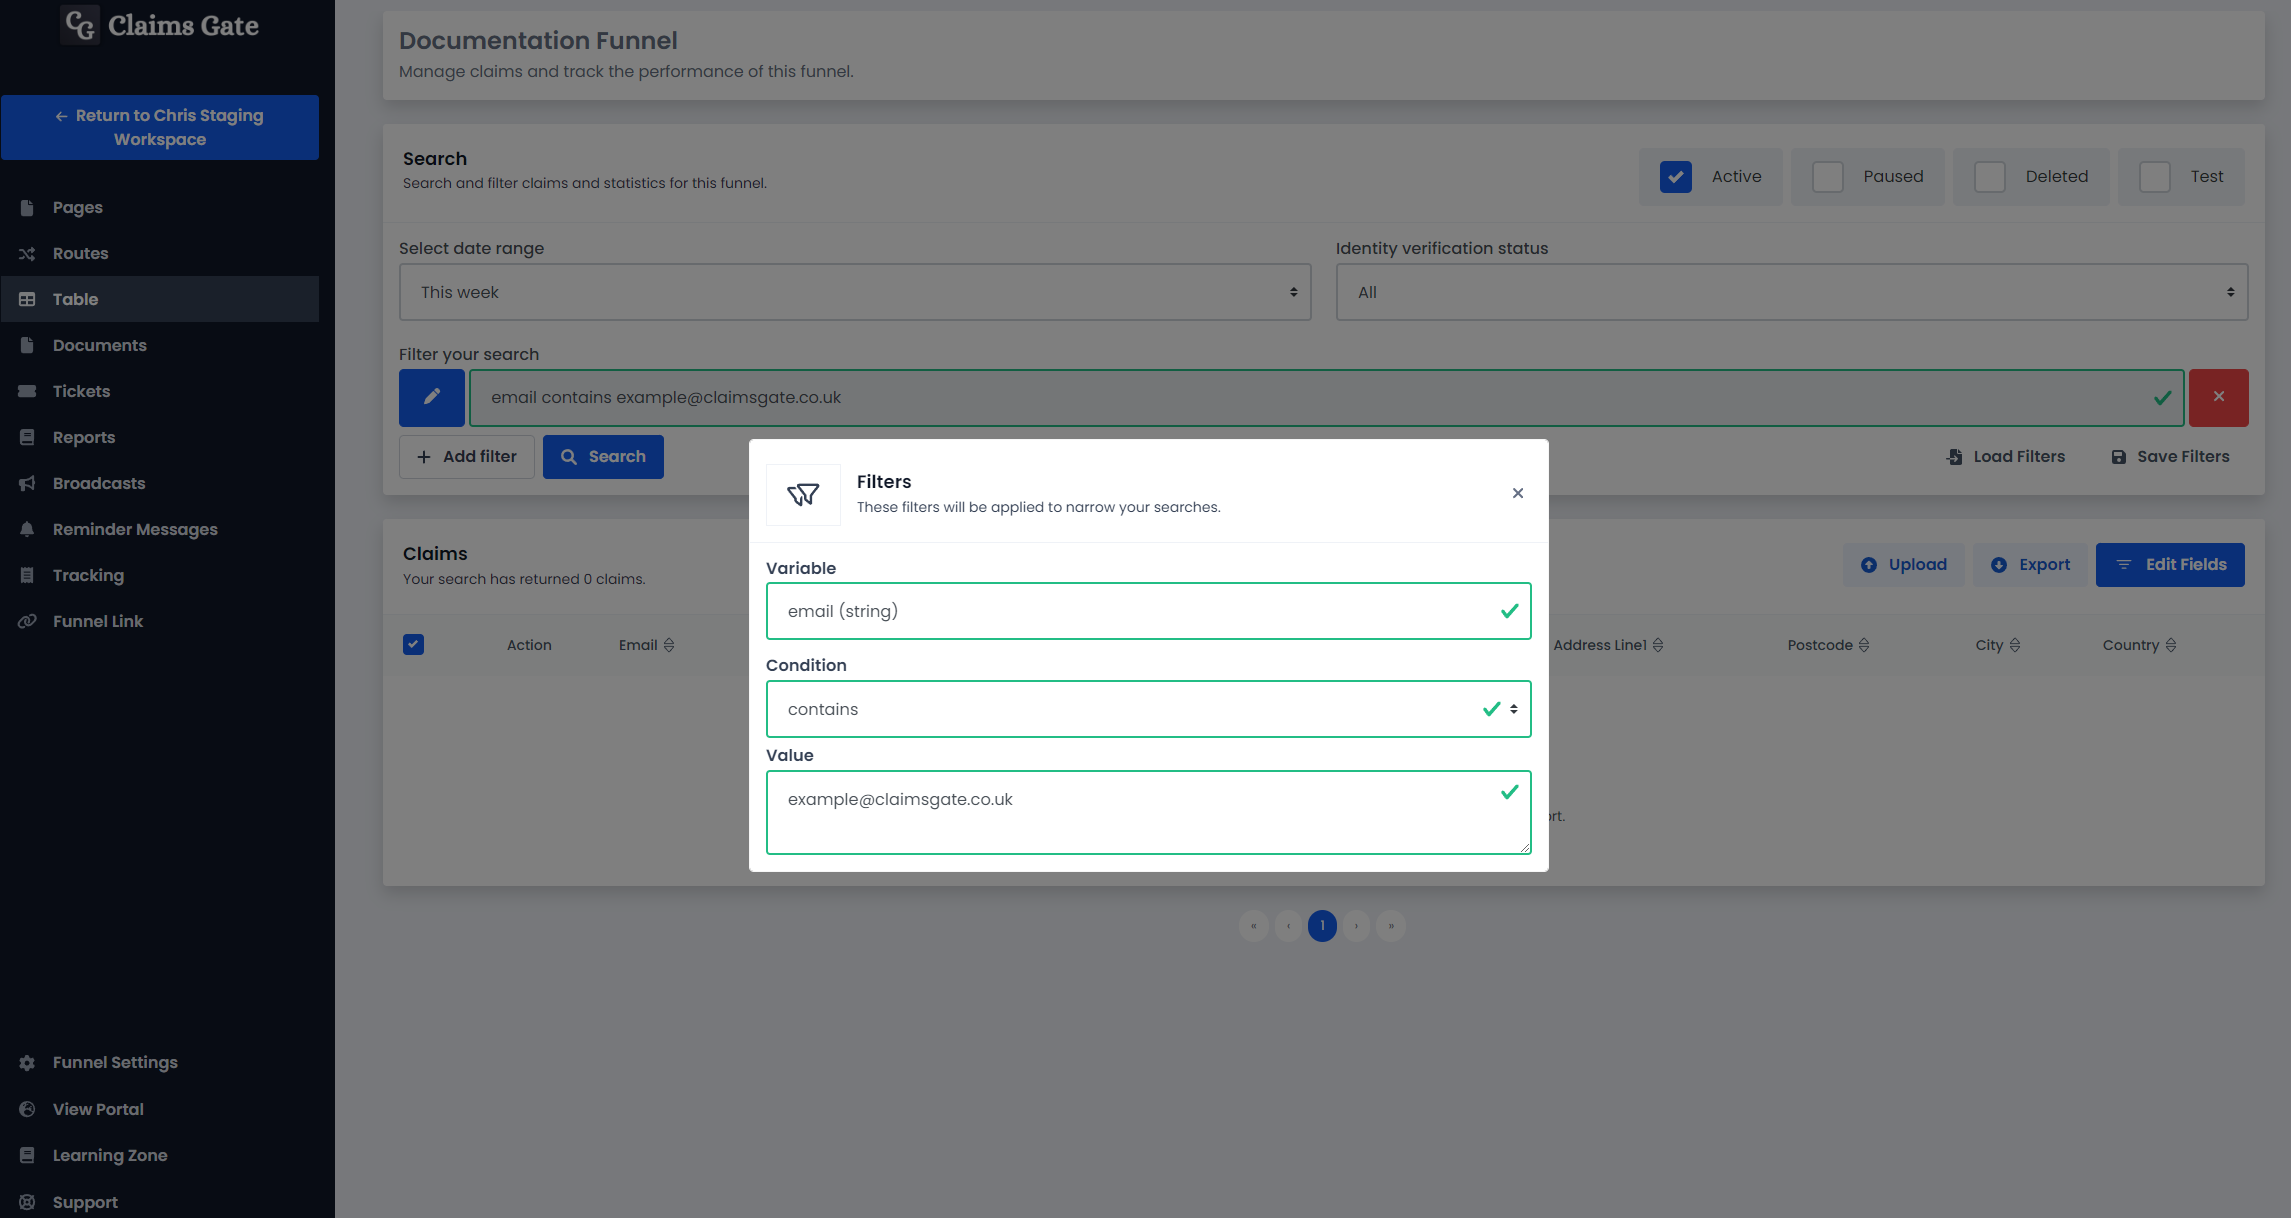
Once your filter matches the photo above, close the modal by pressing the X on the top right-hand side.
Now press the Search button, and the table will only include claims which match which match the emails you entered.
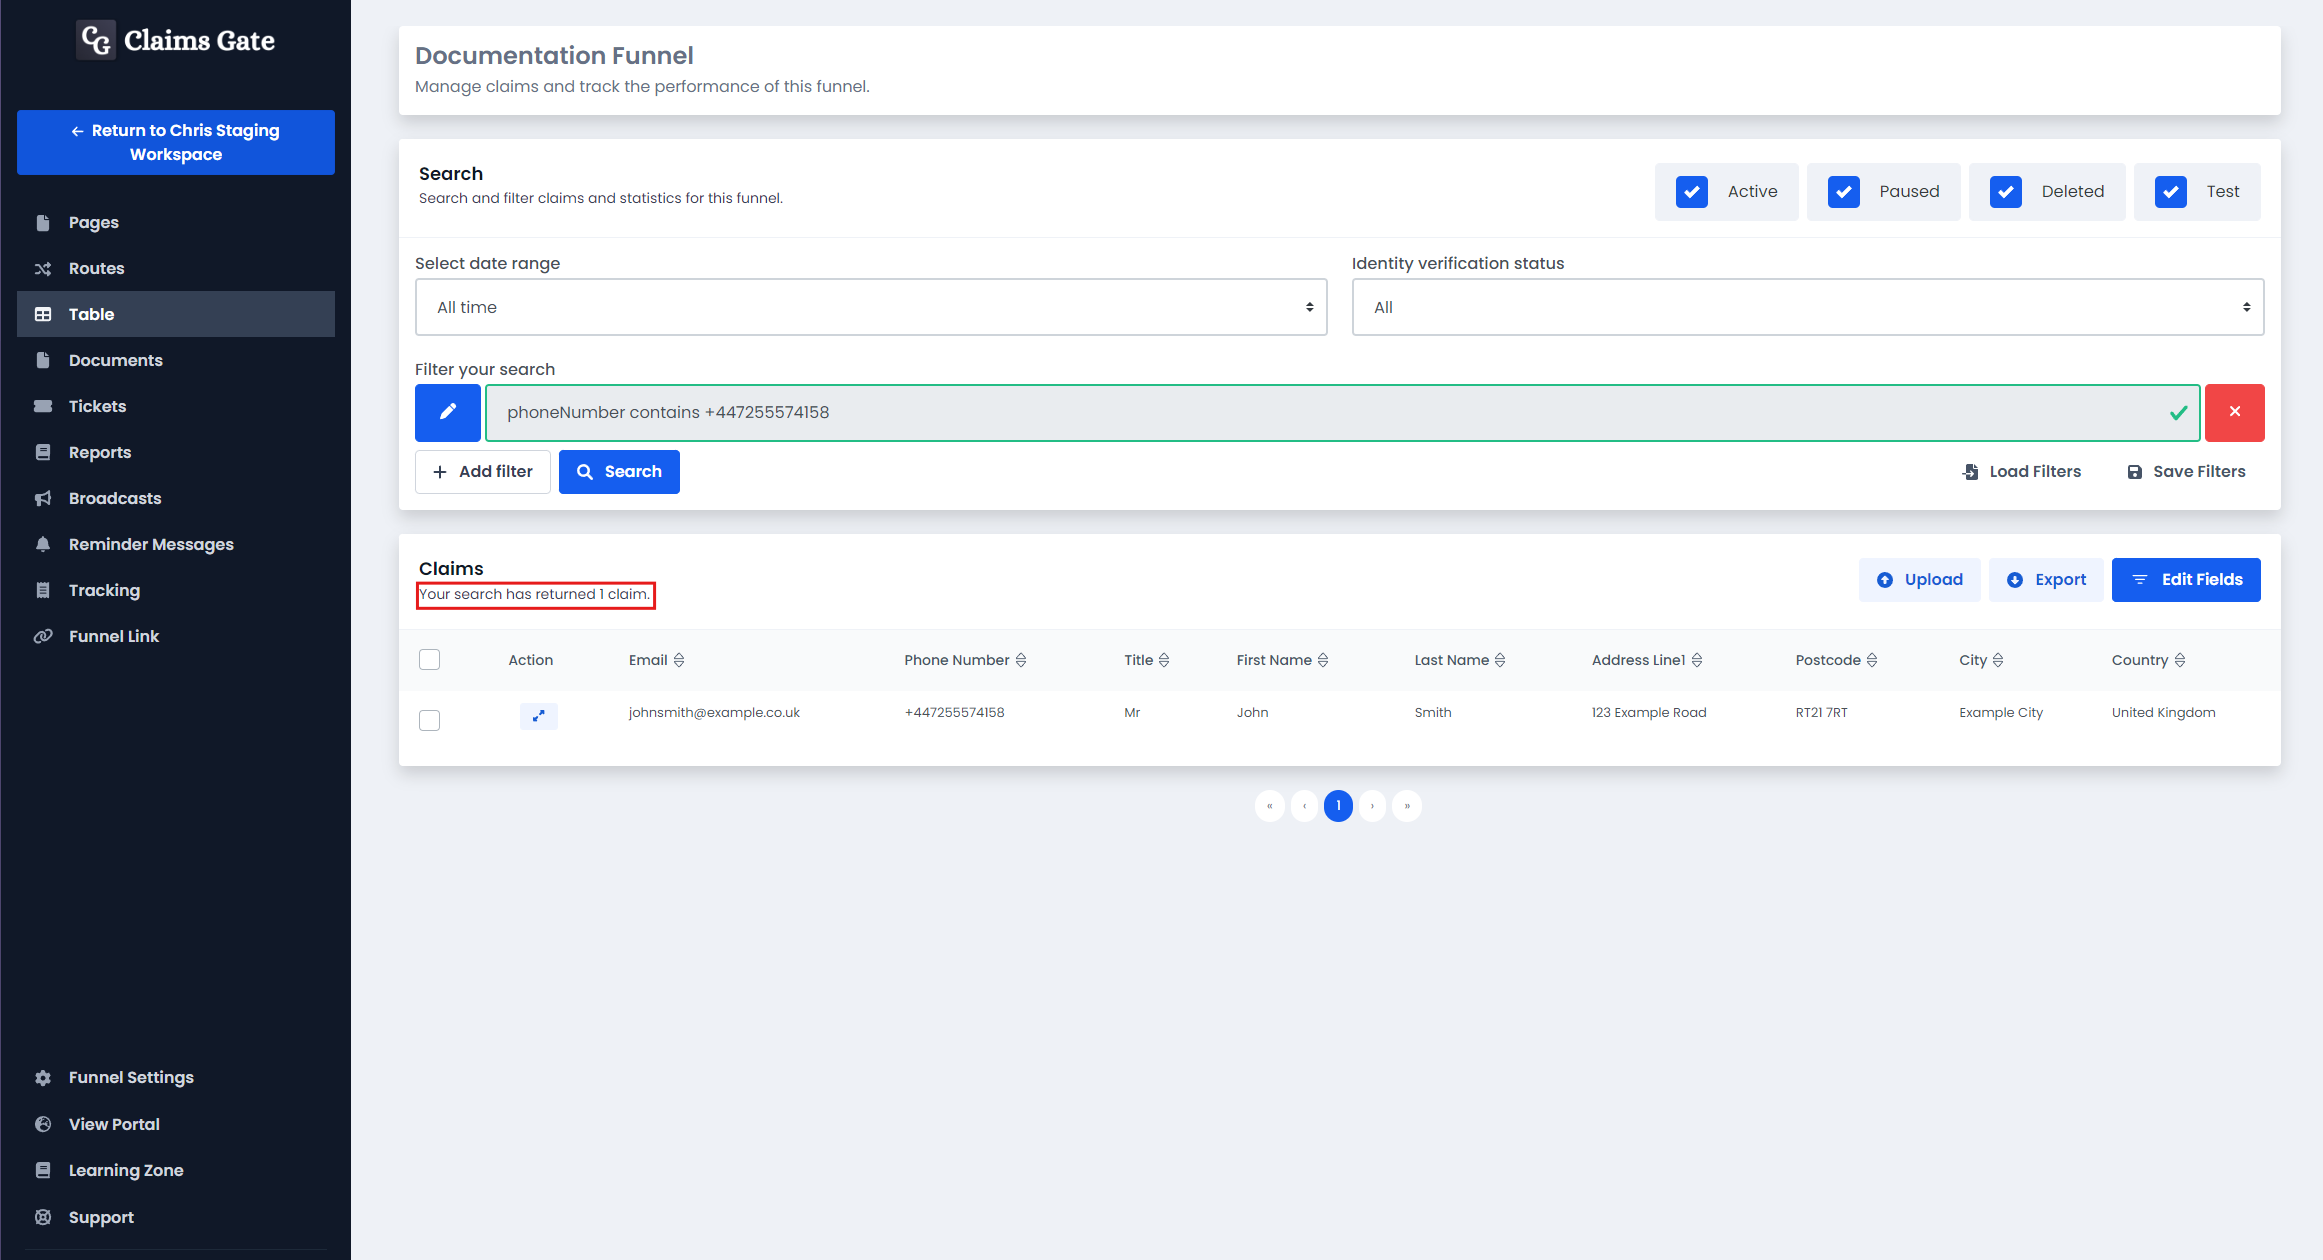
Filter to Return Claims With a Matching Phone Number.
If you have an existing filter, you can delete it by pressing the X button on the right-hand side of the filter.
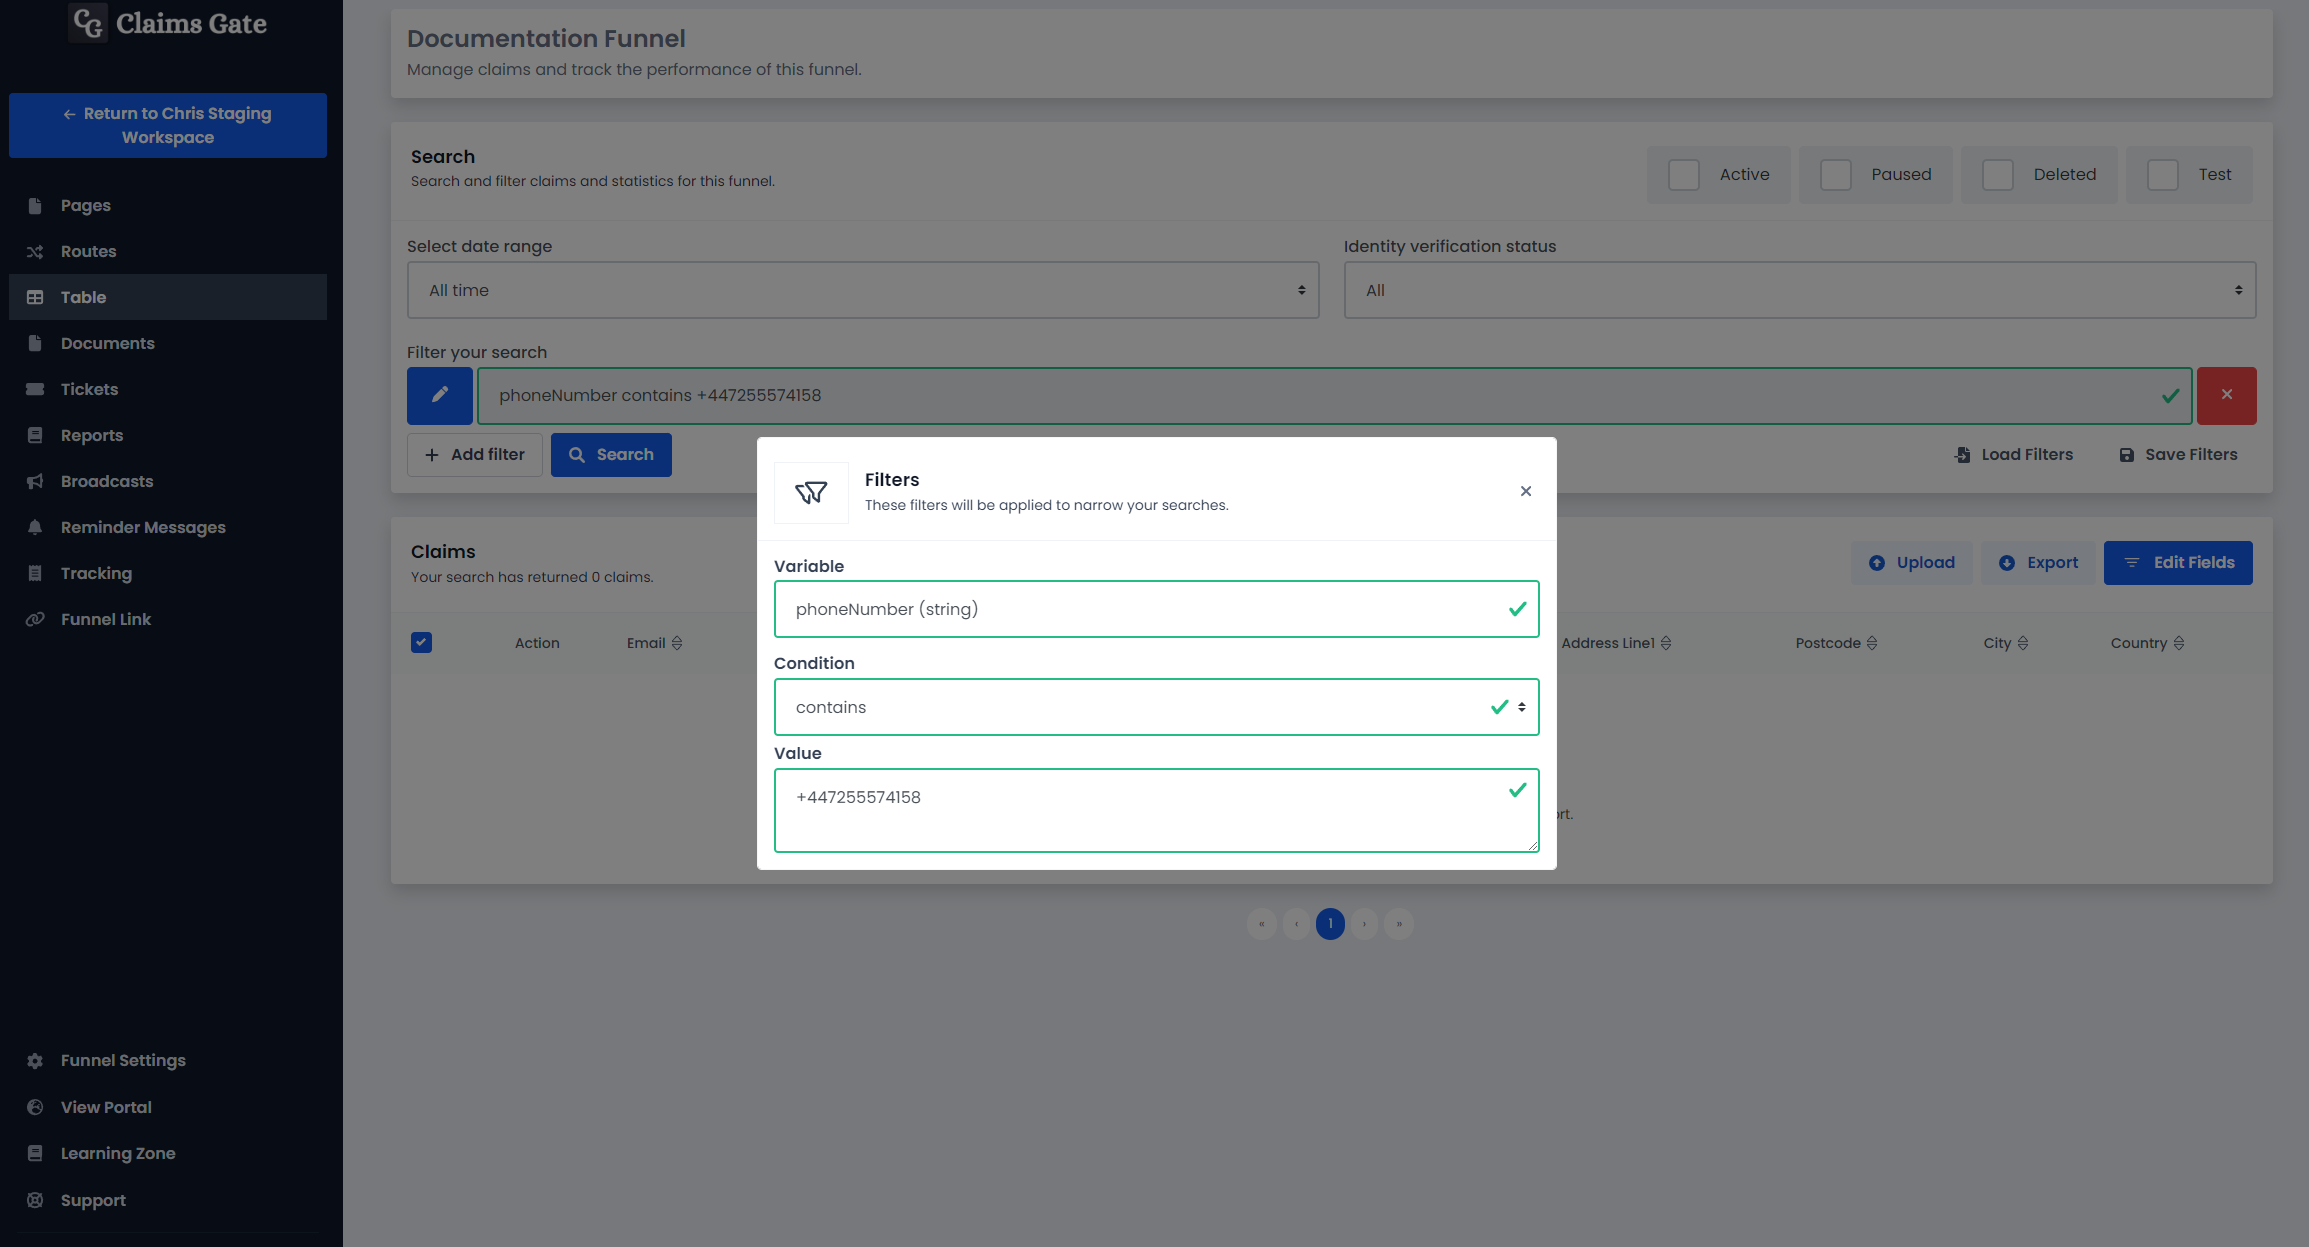
Search and select the variable called phoneNumber.
Select equals or contains as the condition.
Enter the phone number or list of phone numbers in +44 format you wish to match.
Once your filter matches the photo above, close the modal.
Now press the Search button, and the table will only include claims which match which match the phone numbers you entered.
Filter to Return Claims With a Signed Agreement Since the Beginning of Time
Delete any existing filters you have set.
Select All Time from the date range dropdown.
Search and select the variable called agreement.
This will trigger another dropdown to appear, select file.id.
Select exists as the condition.
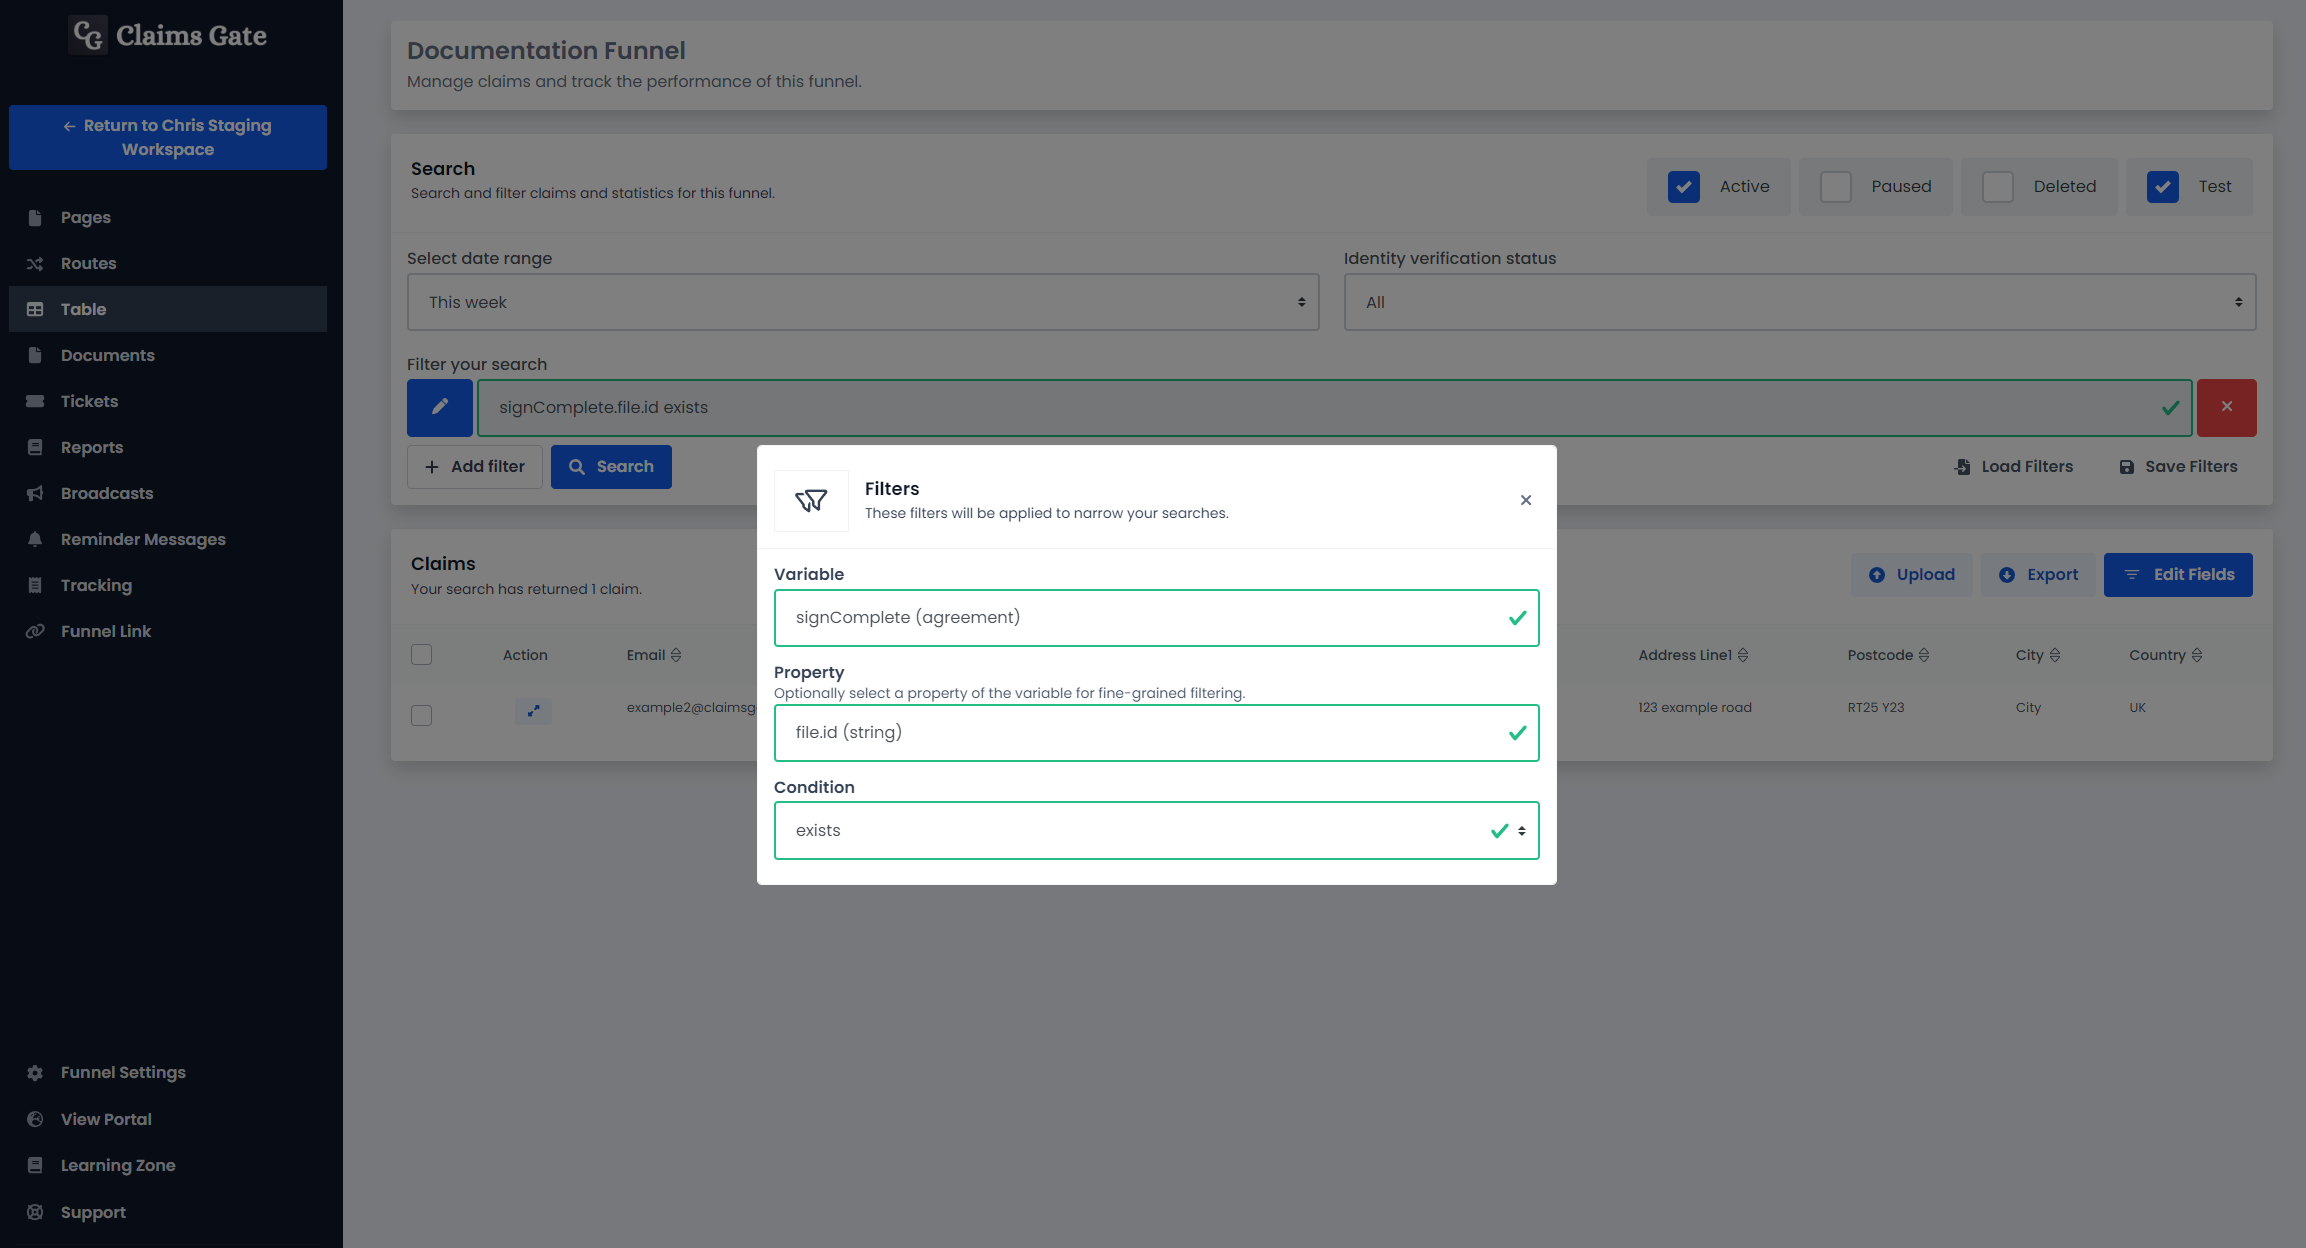
Once your filter matches the photo above, close the modal.
Now press the Search button, and the table will only include claims which have an agreement file since the beginning of time.
The numbers returned from this query are the most accurate available in Claims Gate
