Members
Adding Members to Your Workspace
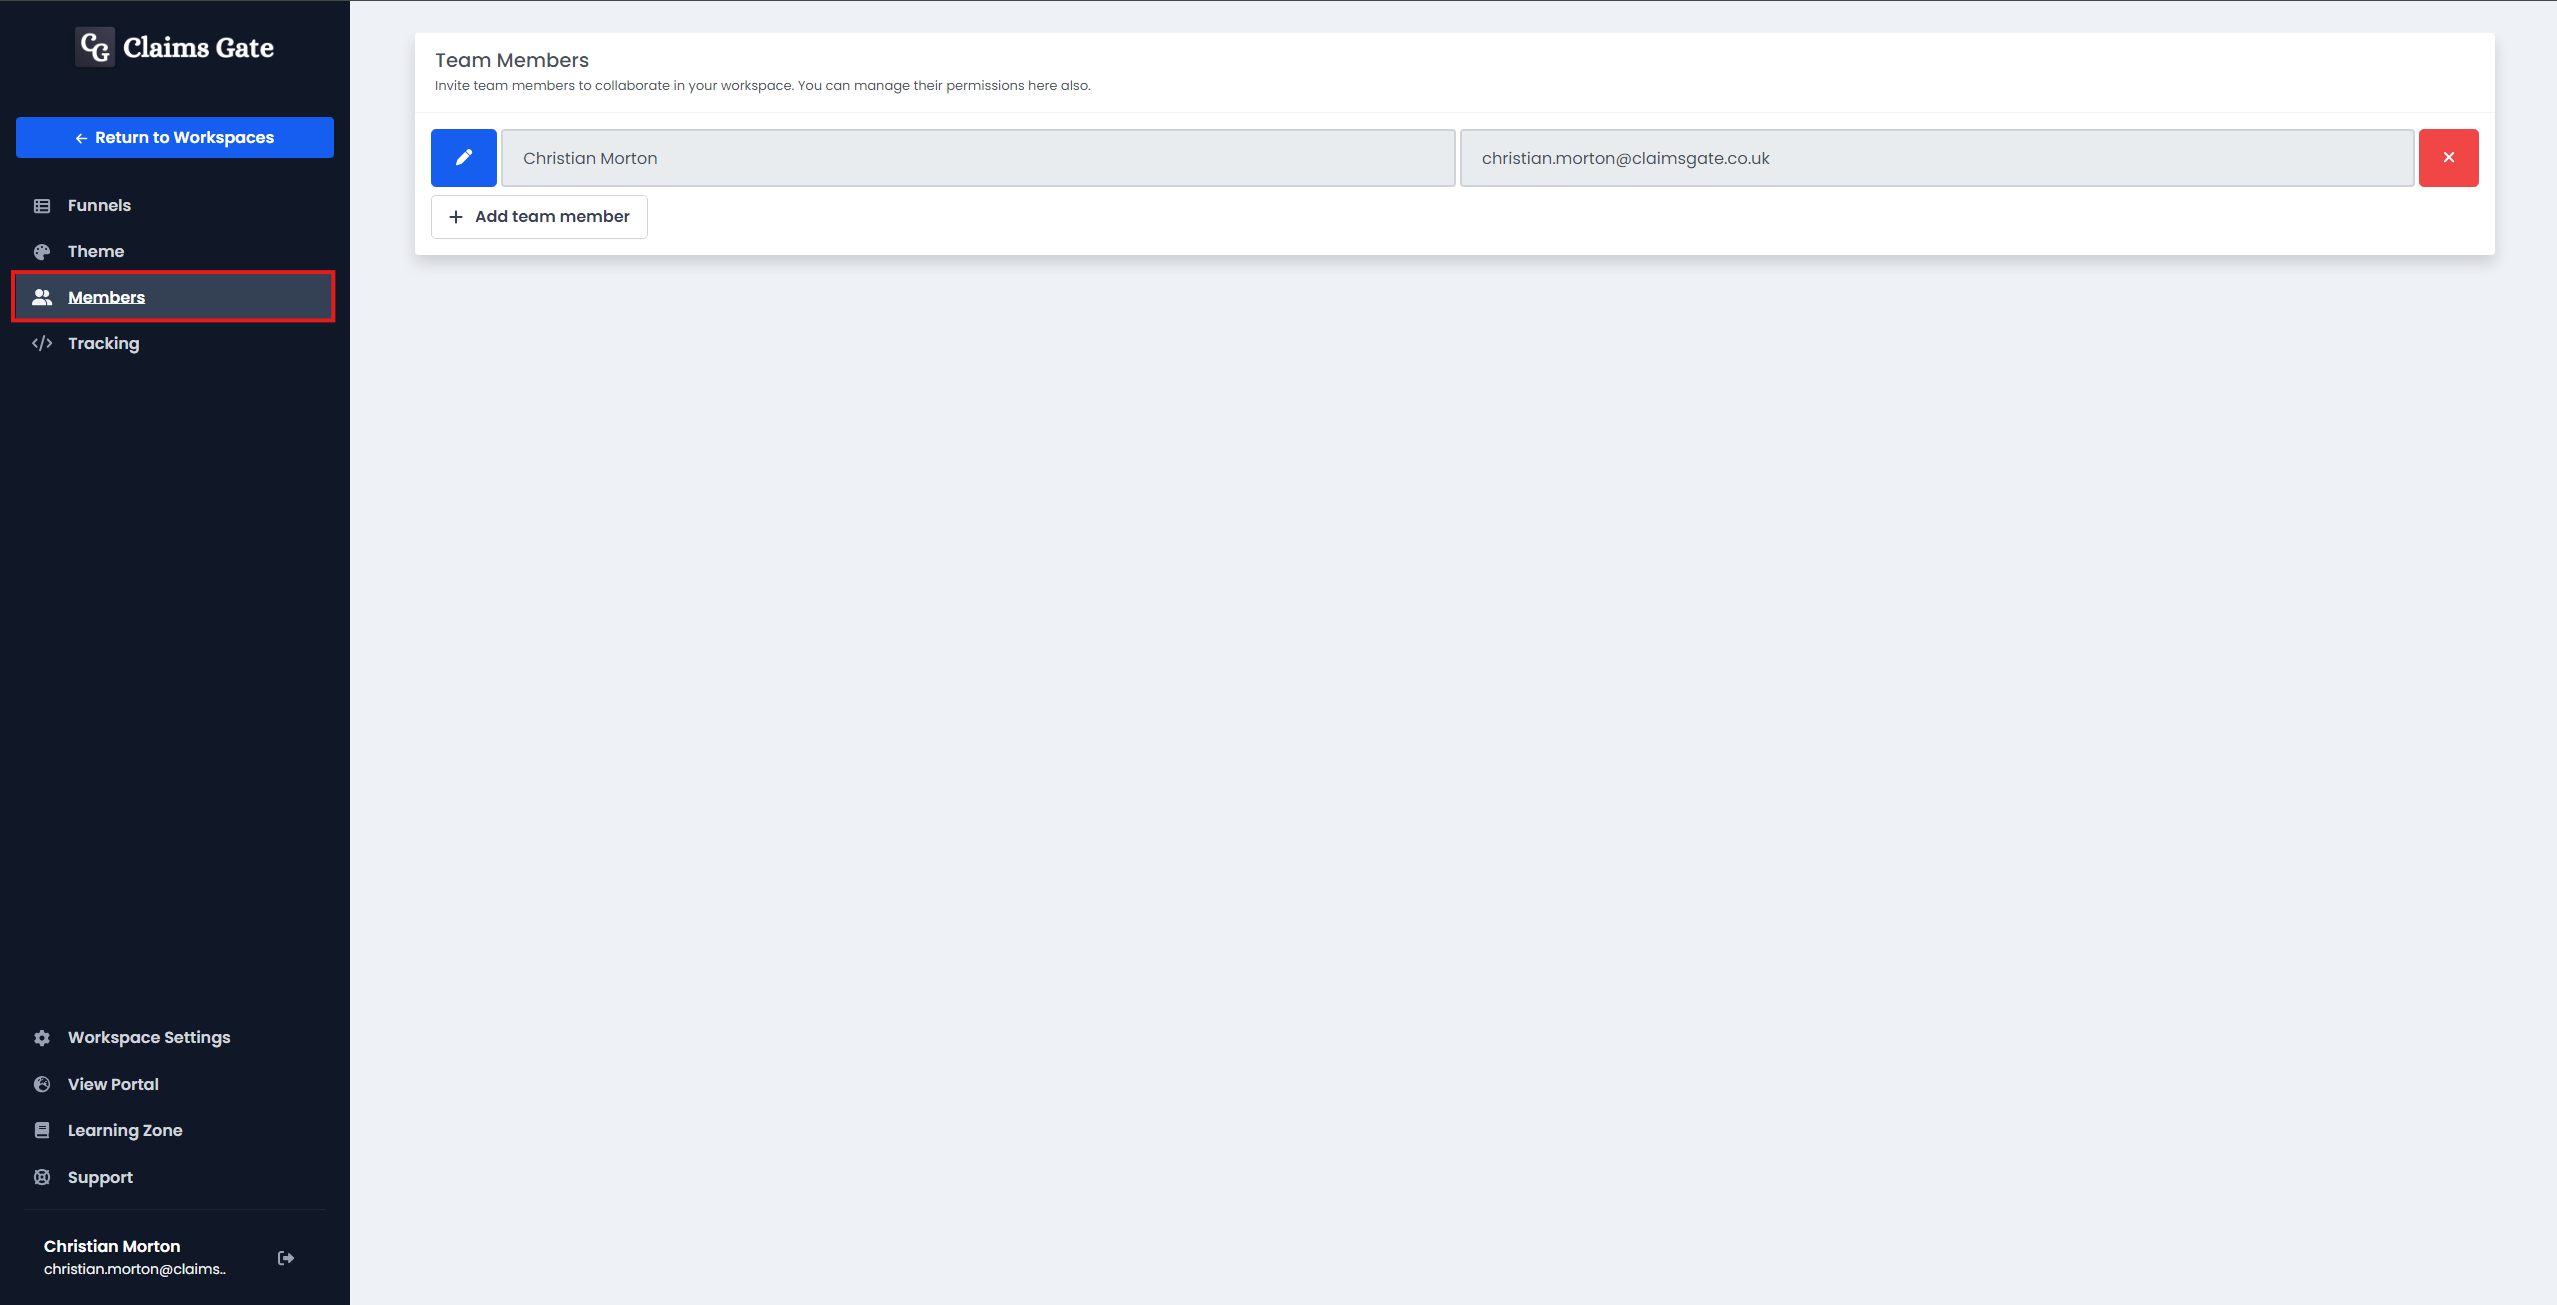
After you have selected your workspace, select the icon that when hovered displays Members on the sidebar on the left-hand side.
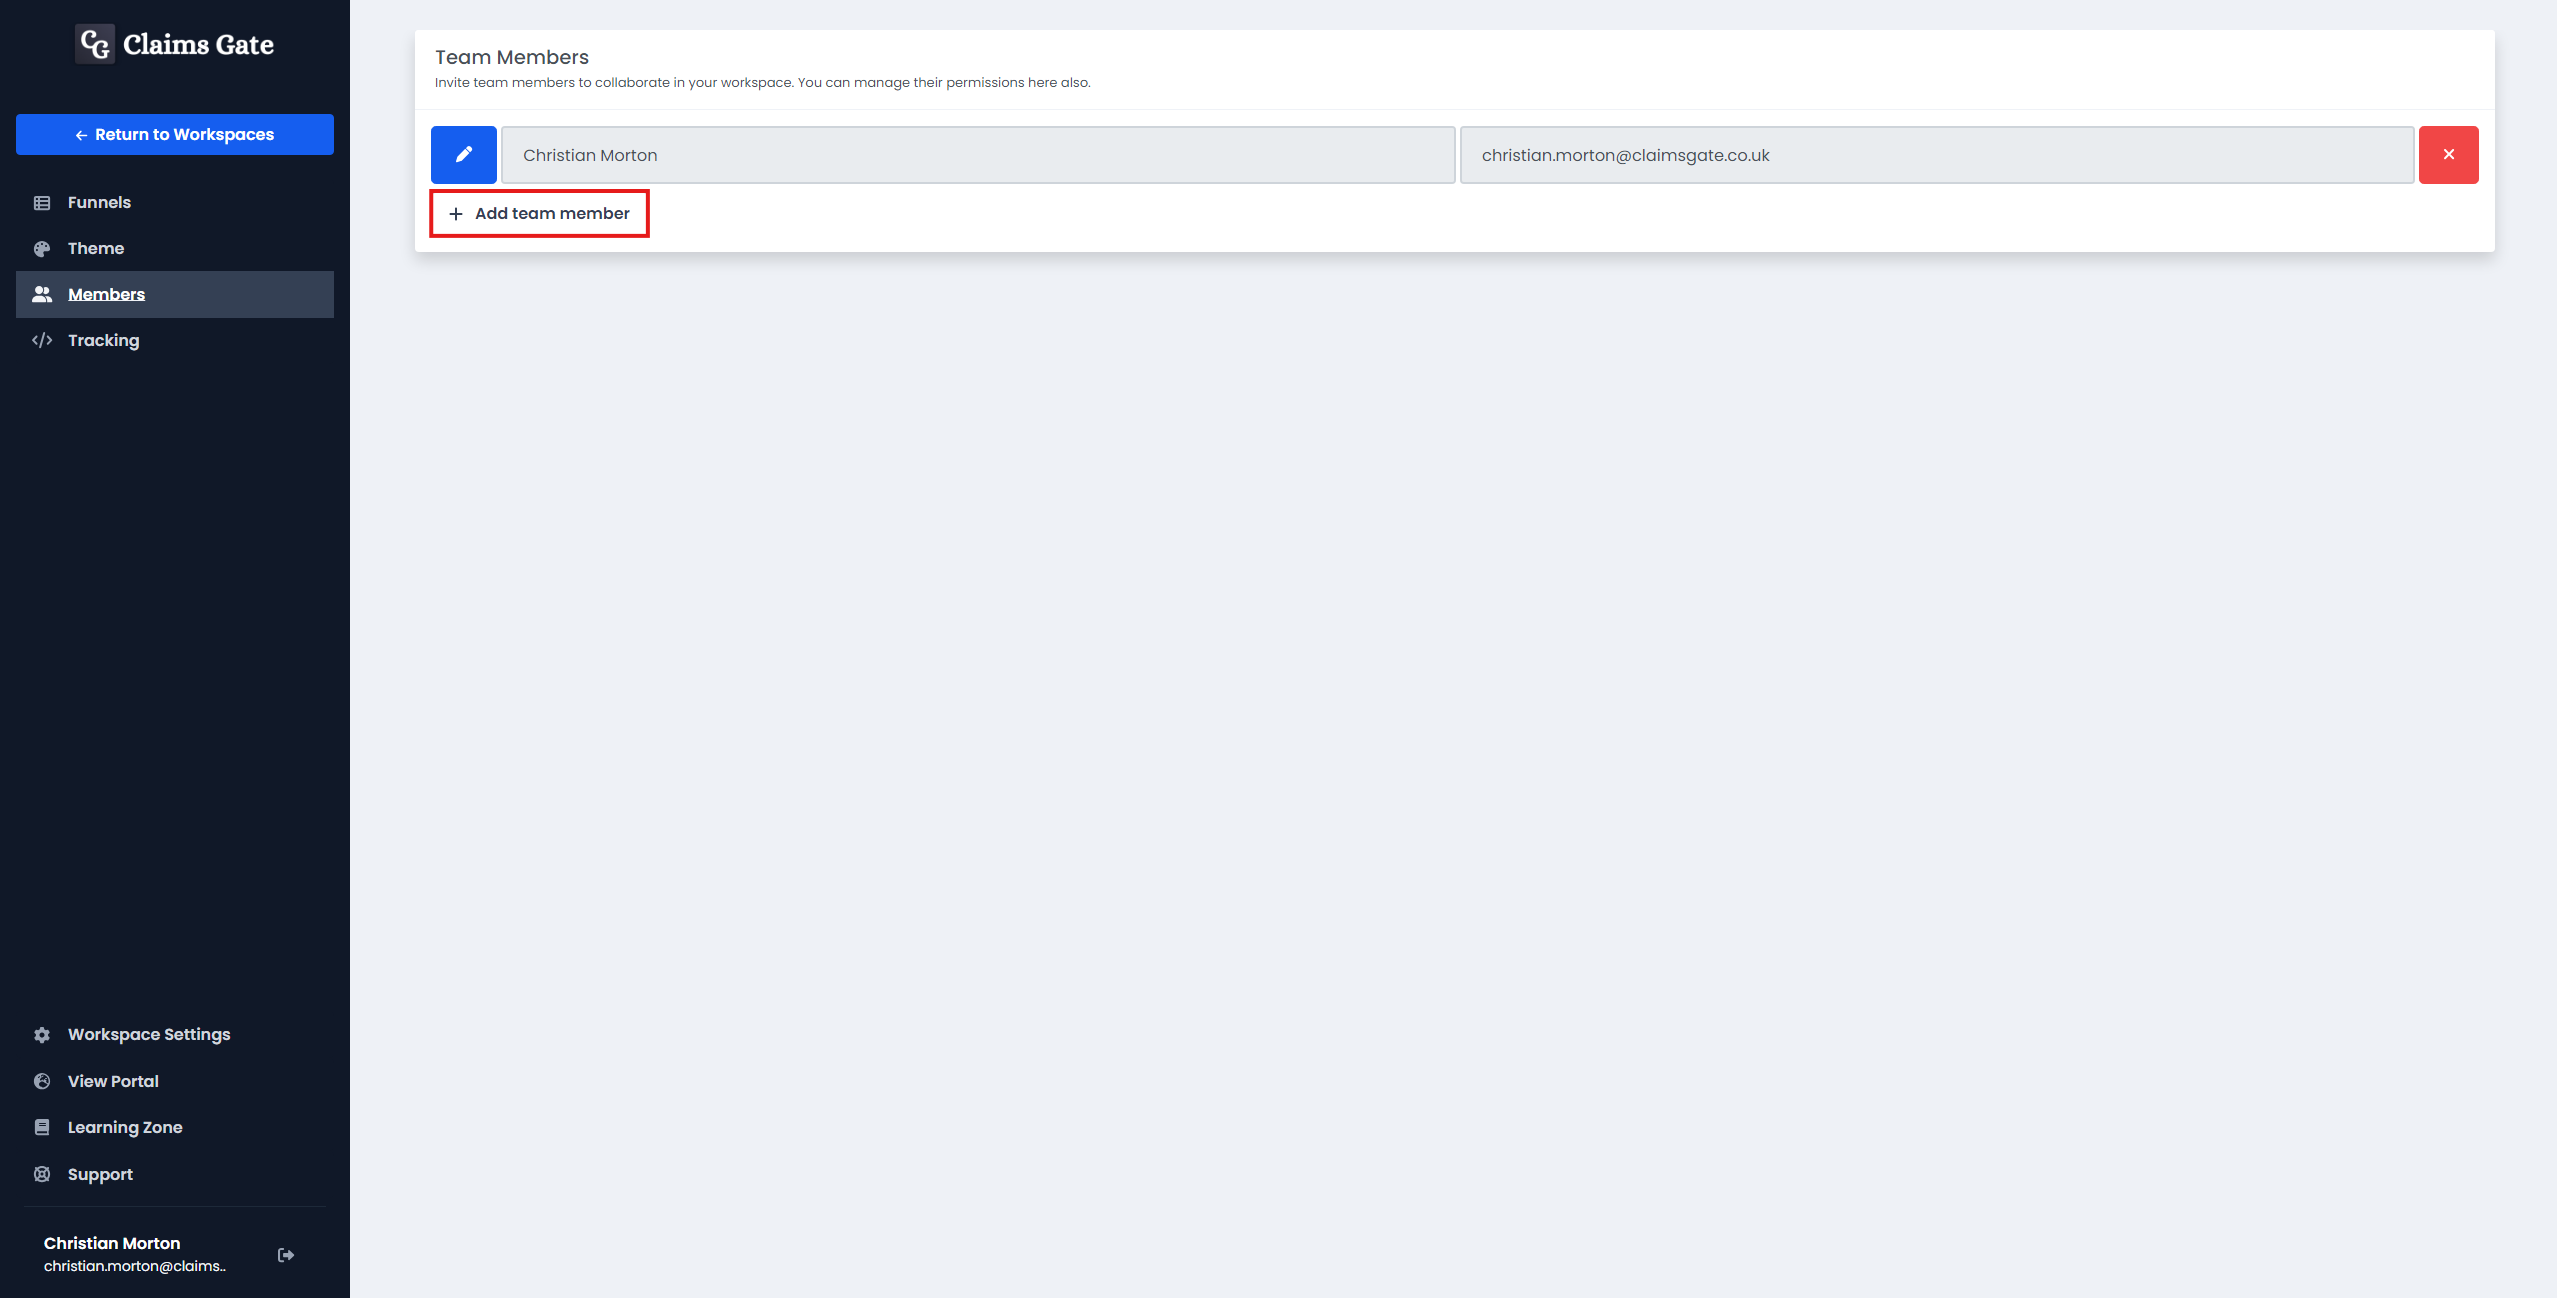
To add a new member to your workspace, click the Add Member button.
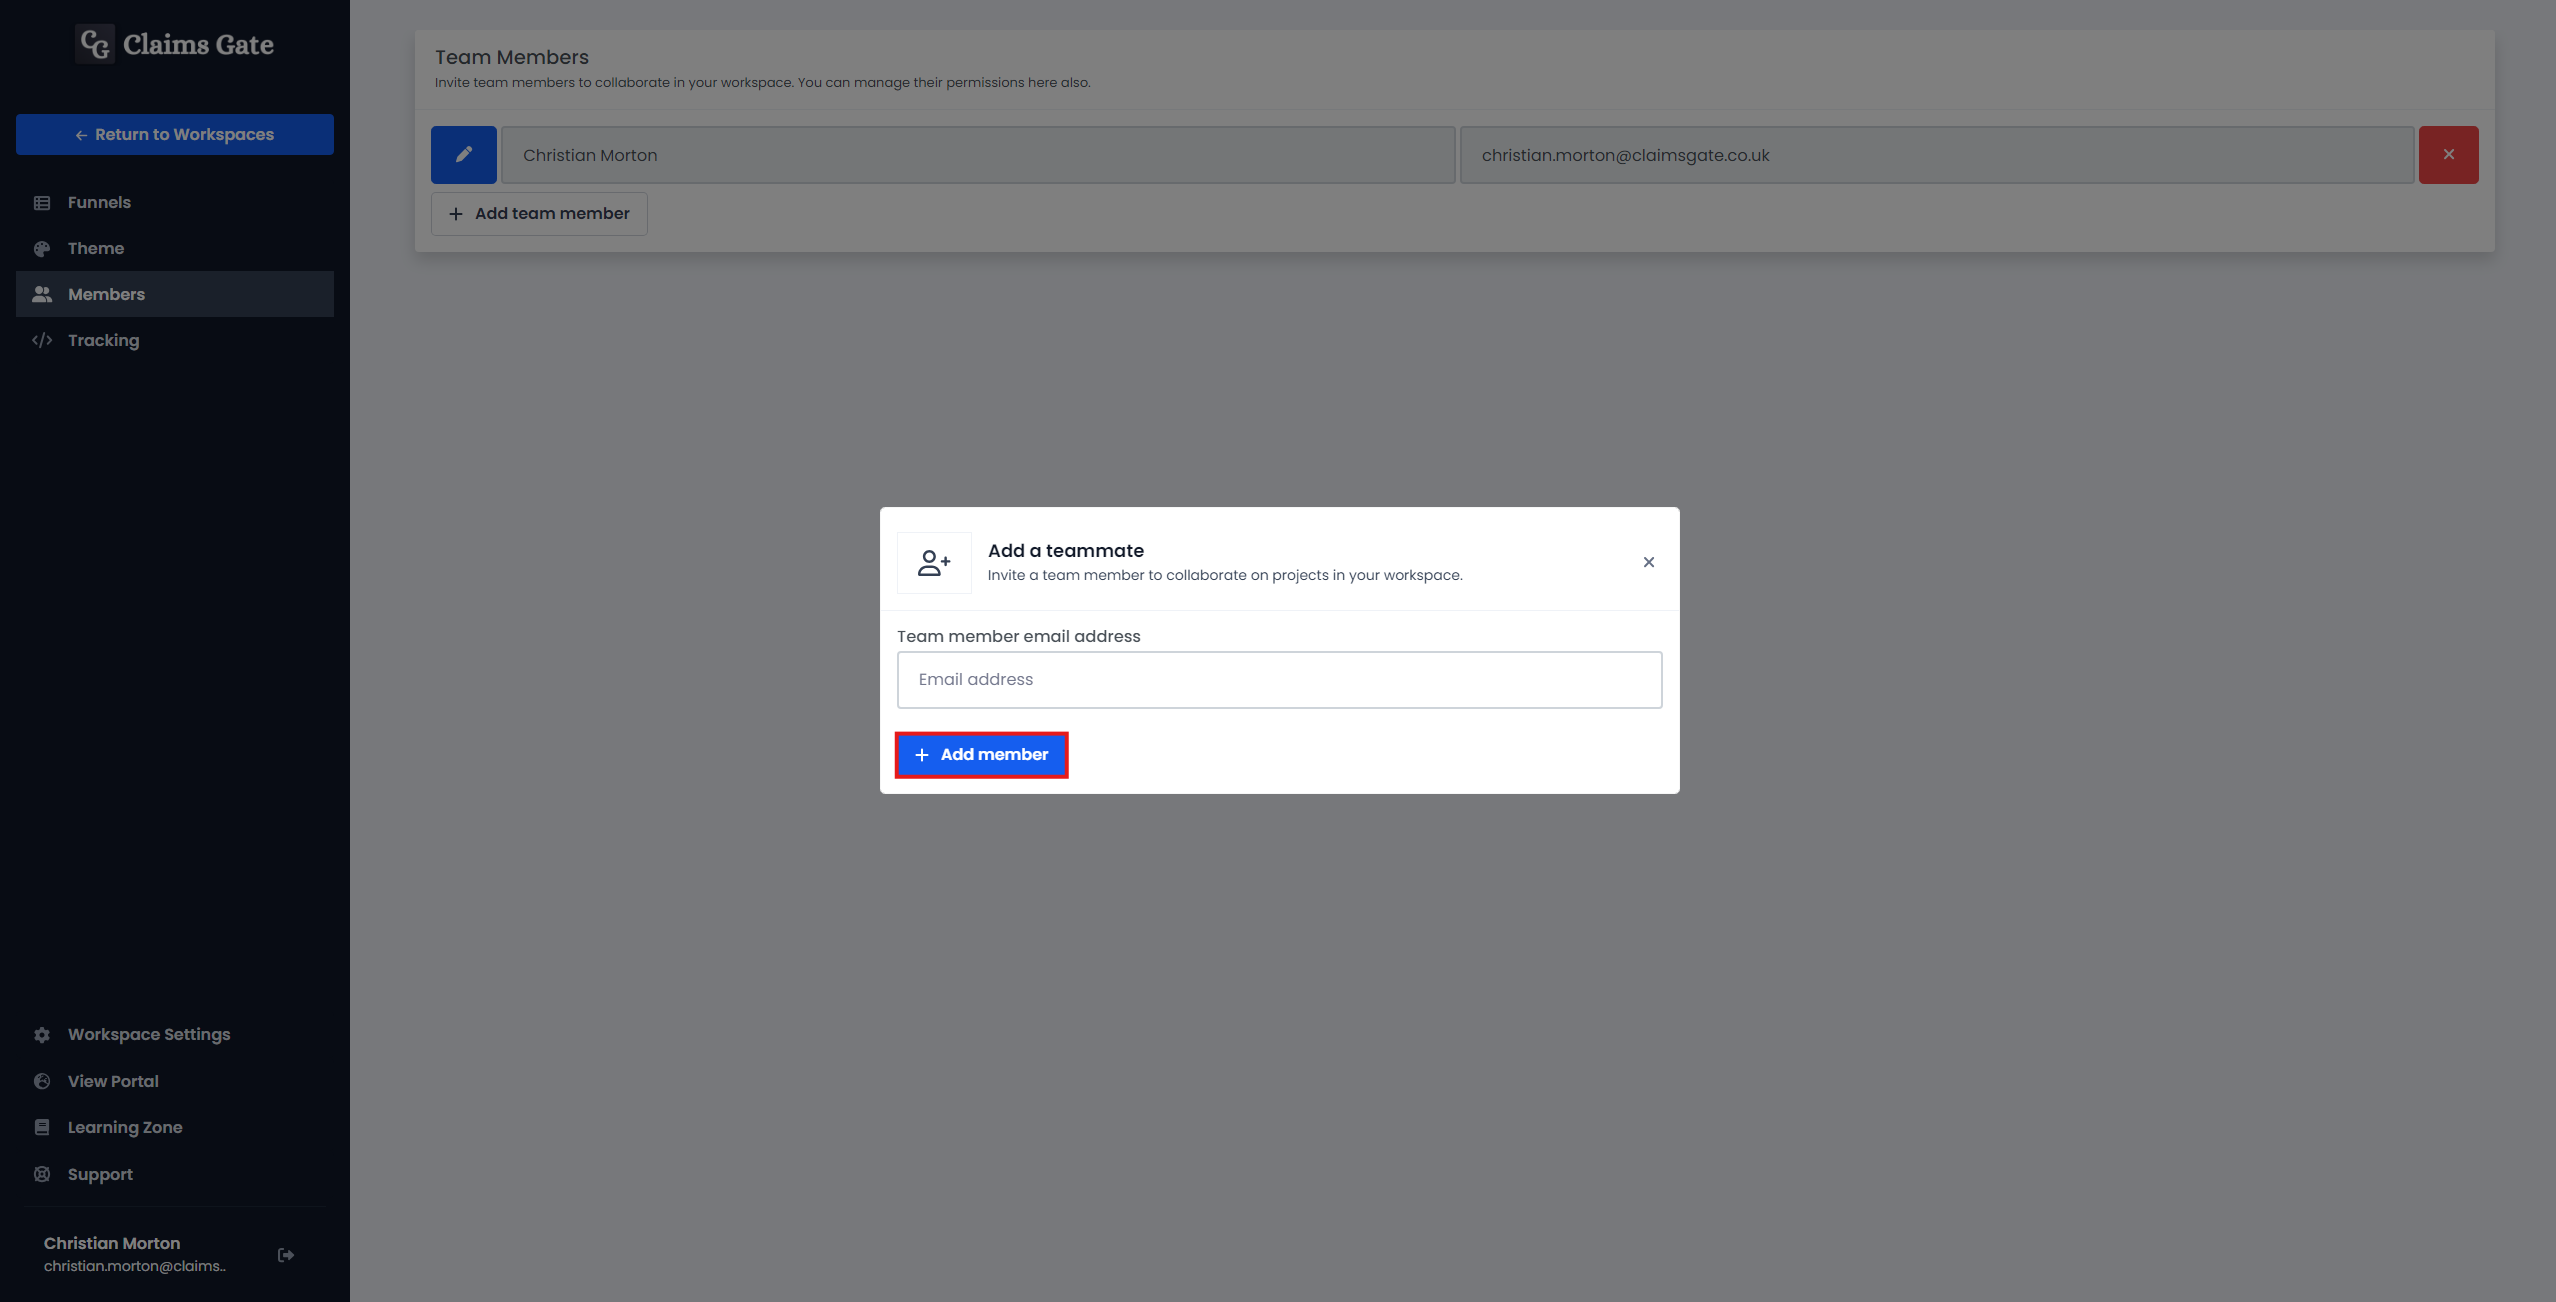
Enter the email address of the member you wish to invite to your workspace into the input box labelled Team member email address and press the add member button.
Once you have added a member to your workspace, they will receive an email containing a link to log in to Claims Gate.
Managing Workspace Member Permissions
After you have selected the Members view, press the pencil icon on the left hand side of the member you wish to edit.

A modal will appear, allowing you to edit the permissions of the selected member.
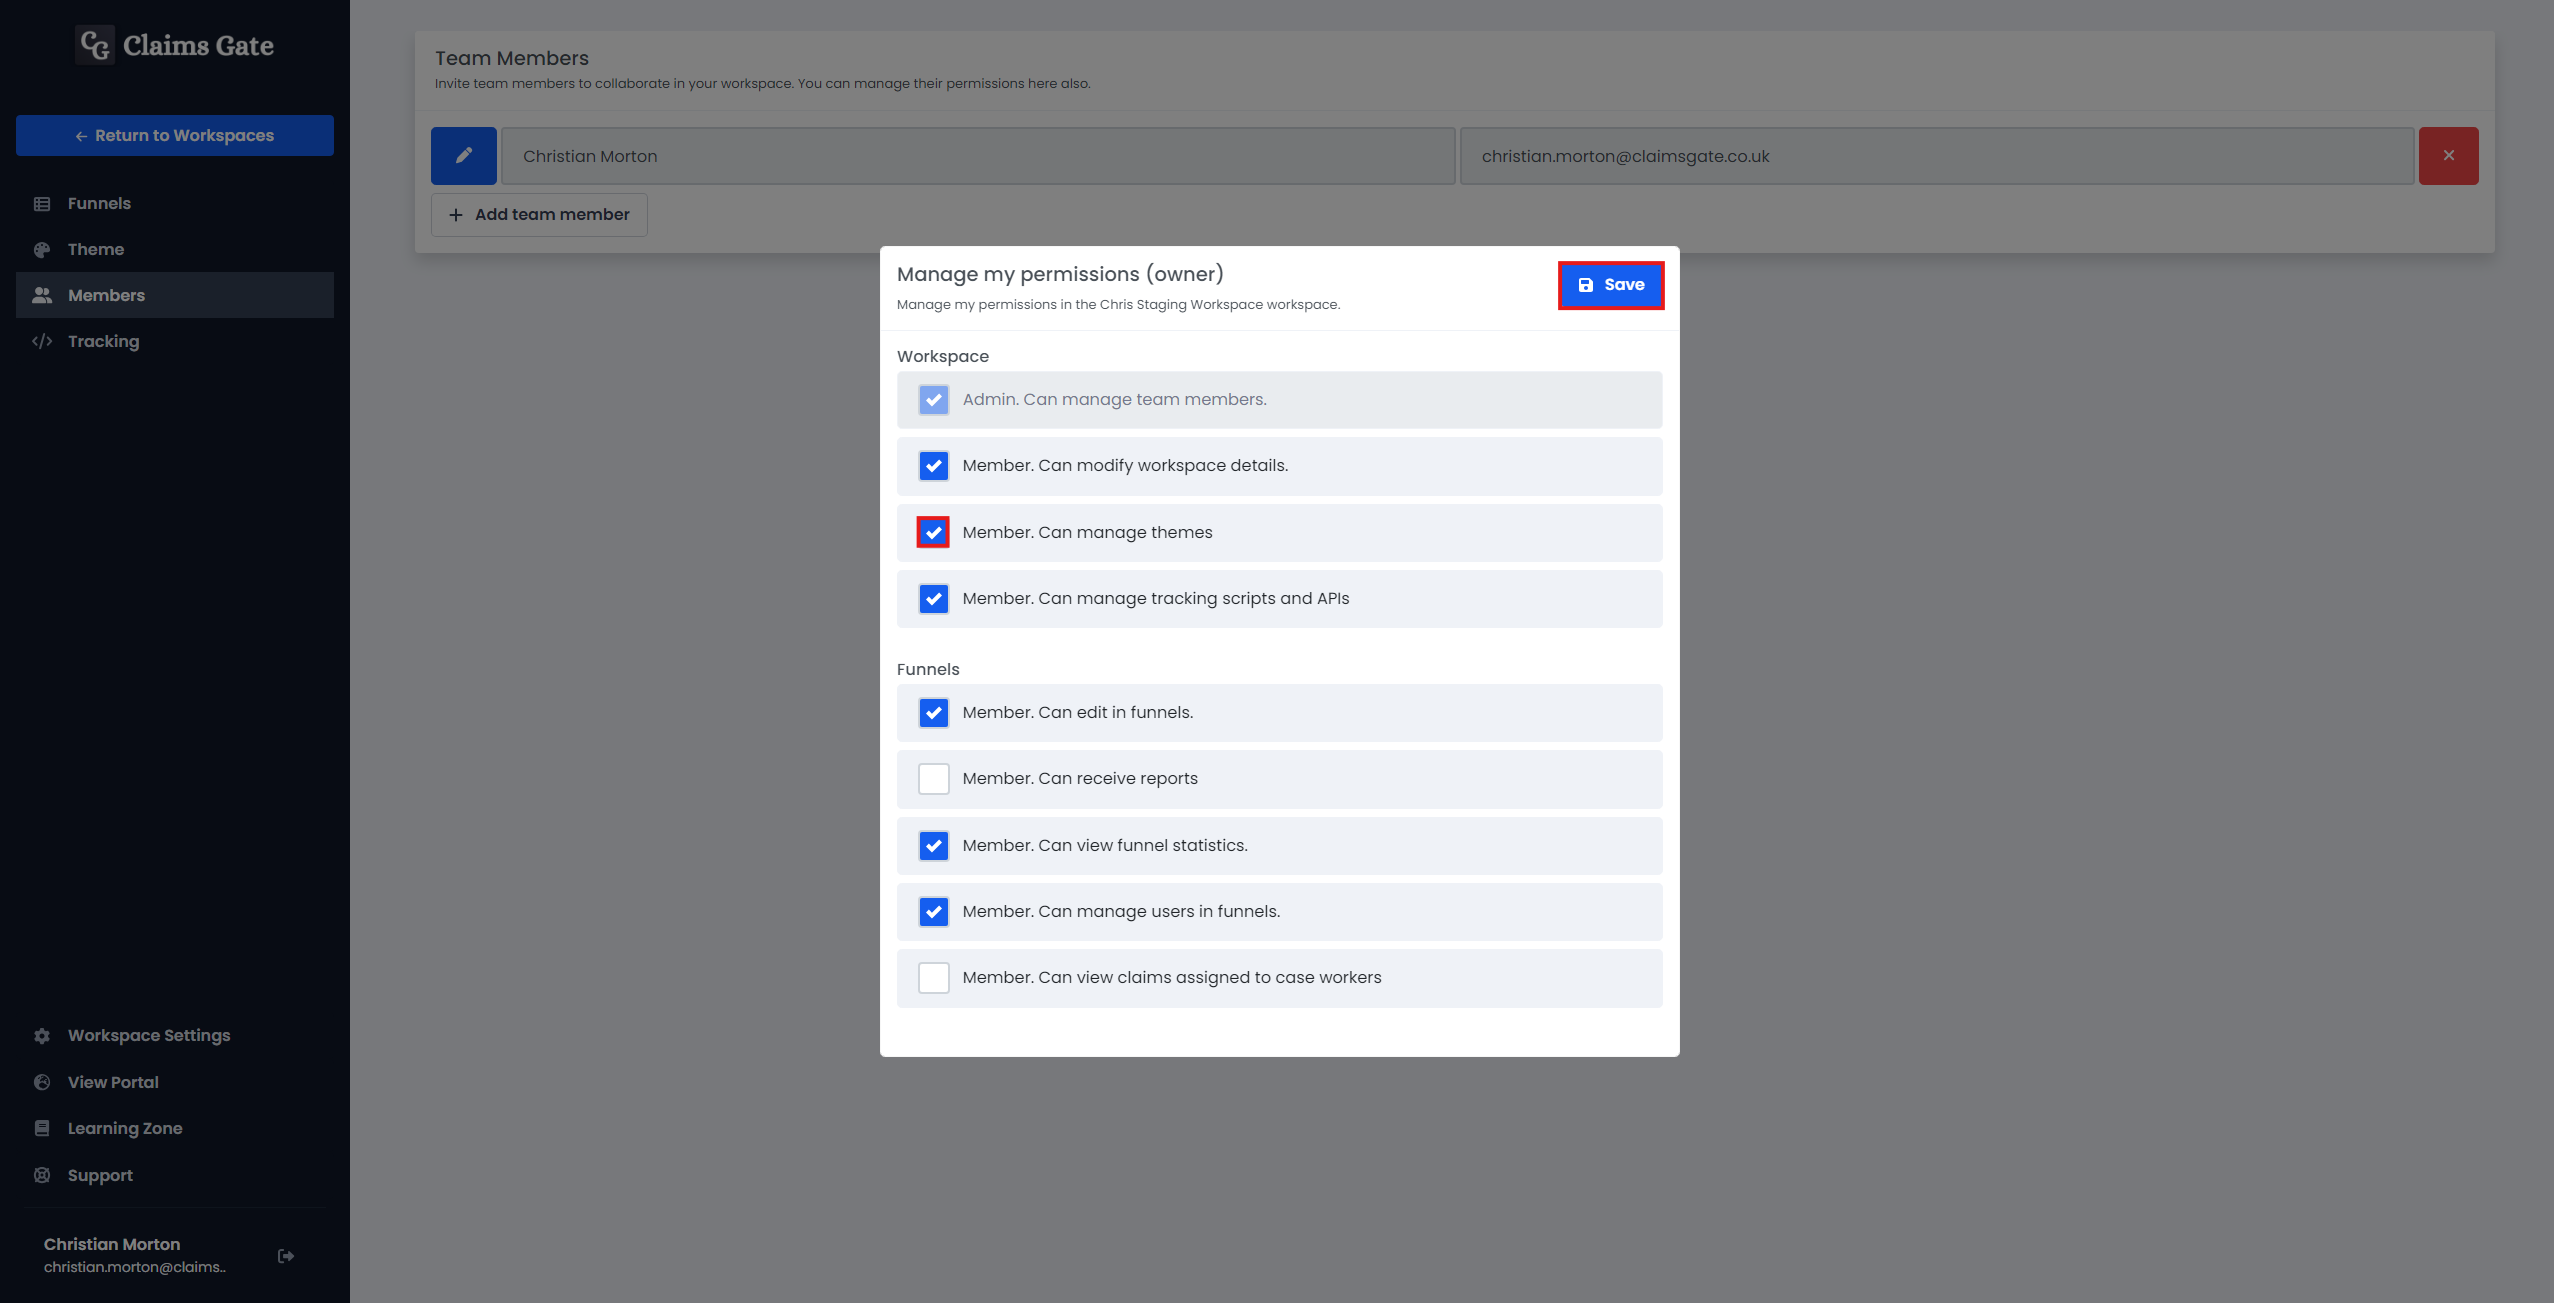
Tick the permissions you would like to grant to a workspace member and save your changes by pressing the Save button on the top right-hand side of the modal.
Permissions can take up to 2 minutes to update and may require a page refresh.